Are you tired of leaking all of the place when you run? Leaking energy that is. Energy leaks are when you perform a movement without proper stabilization, resulting in less than optimal force transfer. Imagine trying to stand up as fast as you can from a really puffy chair. You won’t be able to go as fast because the cushion will absorb much of the force. Compare that to standing from a wooden chair – you’d be able to jump right up because the firm surface is stable and transfers all the force you apply to propelling yourself upward. In any athletic movement, a general goal is to maximize force transfer – resulting in a faster throw, a higher jump, a harder hit, etc. I call this general function of the core ‘checking’ (to keep something in place). It differs from pulsing and bracing in that it generally is an automatic function (whereas the other two, you consciously contract your core). To improve energy leaks, they must first be identified – then movement-specific checking can be addressed.
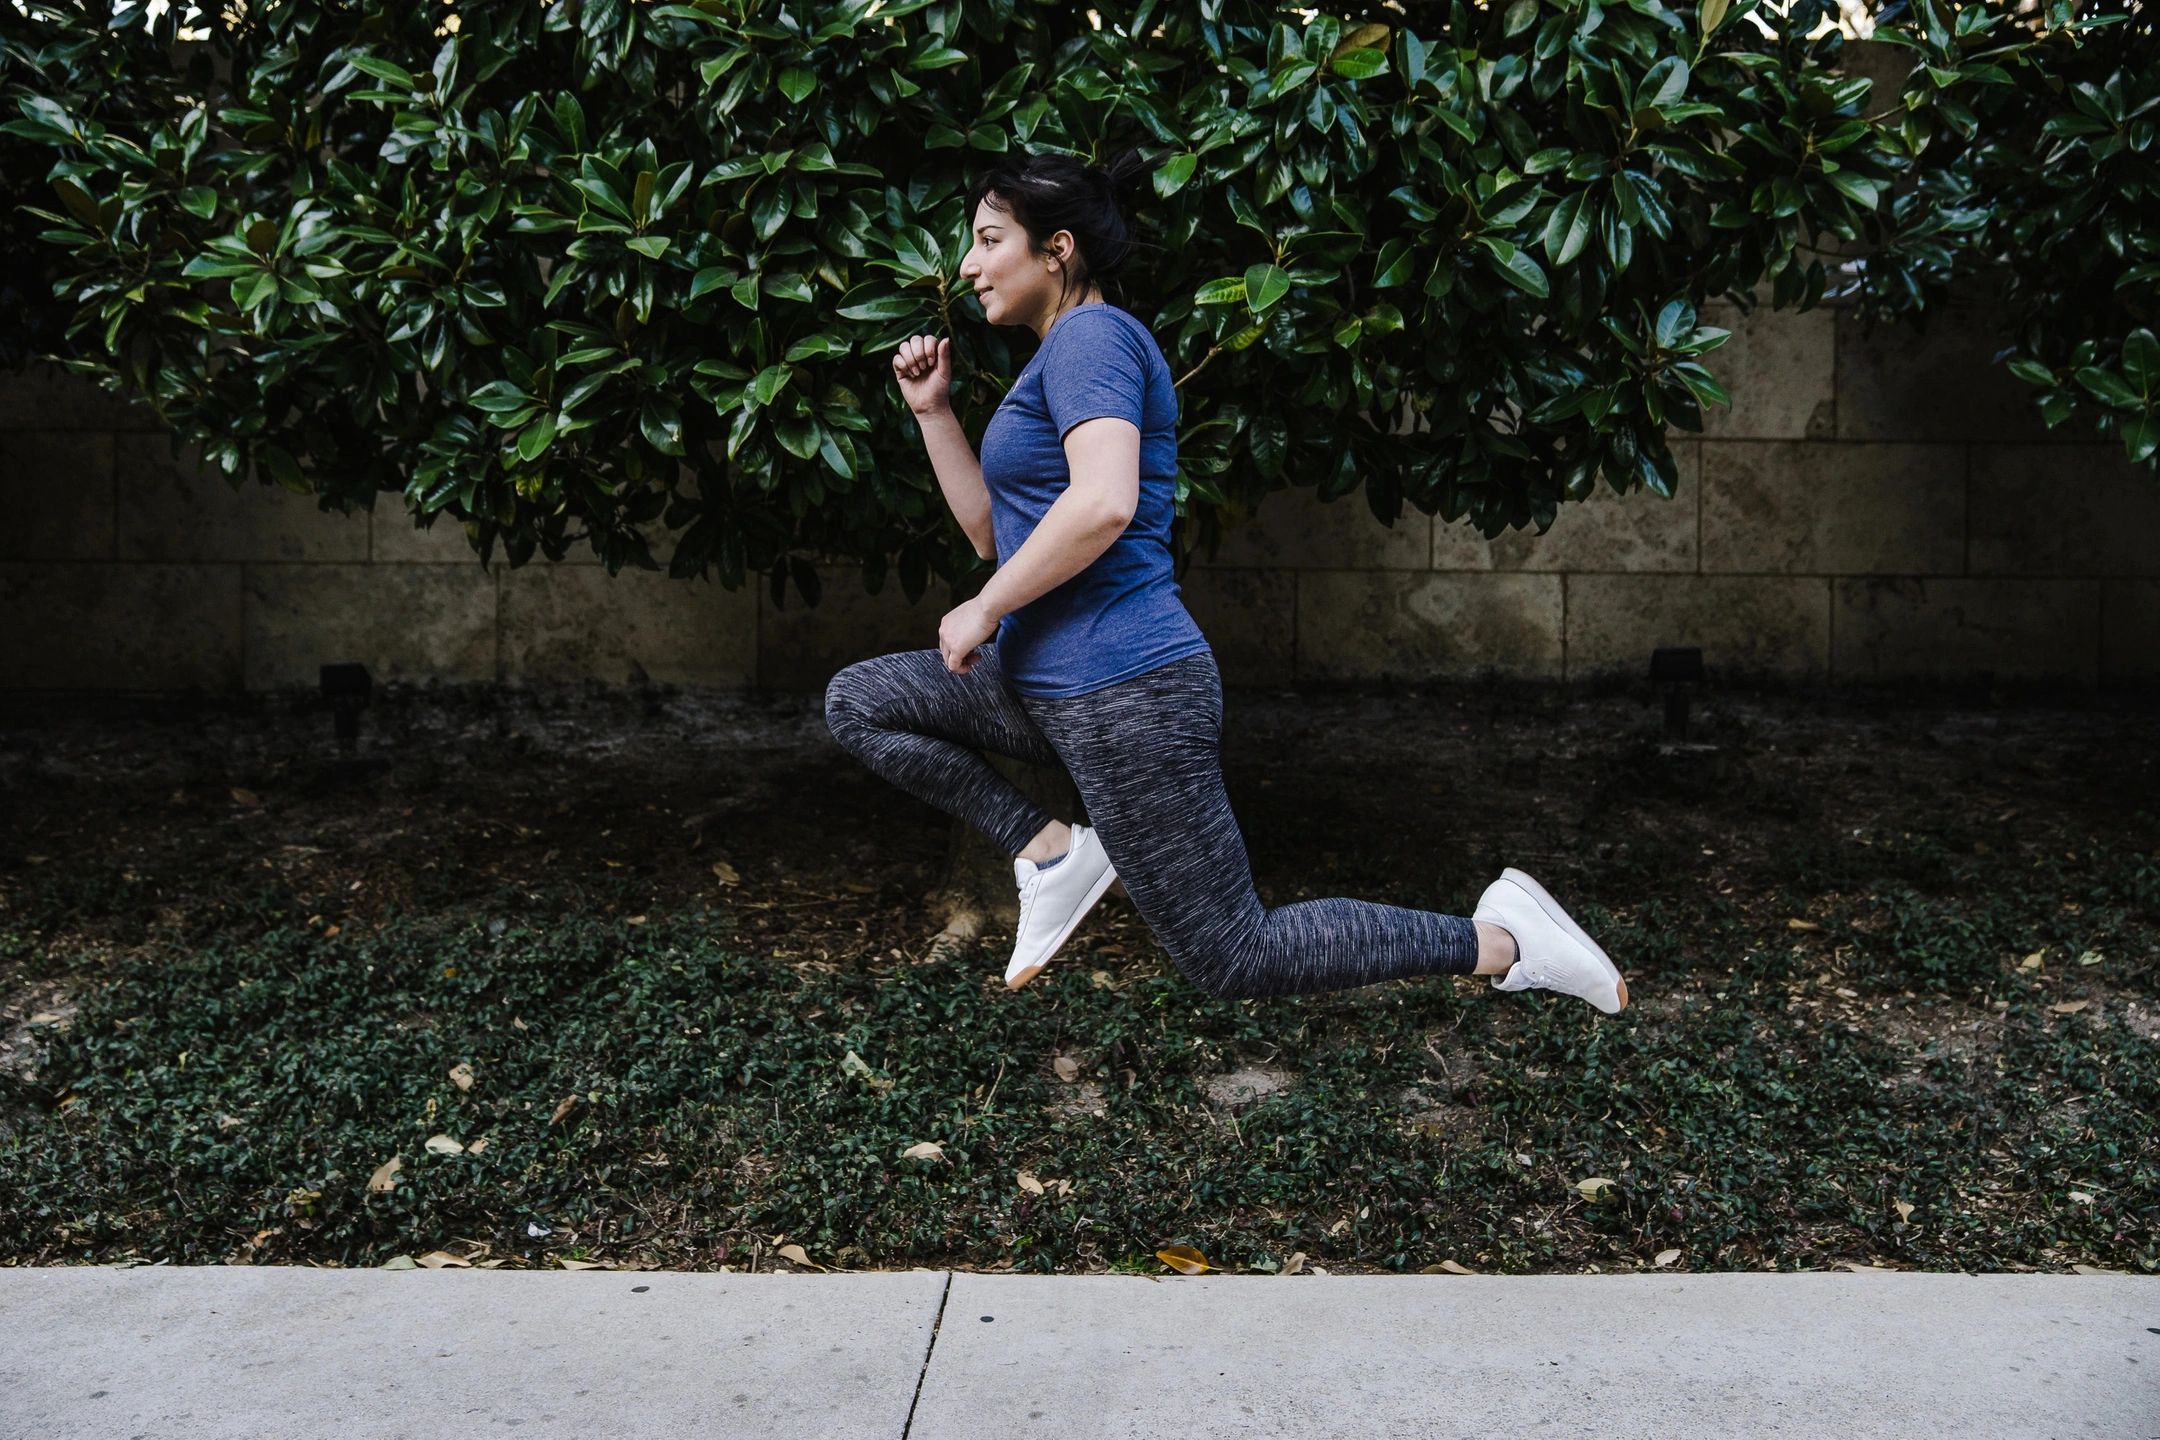
Identifying energy leaks generally requires consulting someone who can analyze your form. This could be your coach, a workout partner, or even yourself by analyzing video of yourself. Energy leaks can be spotted because a visible ‘collapse’ happens in the movement. With running, this is often apparent when the swing leg side (the side that is not touching the ground) ‘collapses’ a few inches instead of keeping the pelvis more level. With any swinging movement (golf, tennis, fighting, baseball, etc.), it’s often seen as the hand(s) contacting the object relatively too late in the swing because the hips rotated faster than the core could check the rotation (the crucial anti-rotation strength that allows the power generated in the hips to be transferred to the arms which then amplify the power by acting as a whip due to the longer levers of the arms). This article won’t go over how to identify energy leaks because it’s much too movement dependent, but it’s usually best to seek an outside perspective.
Next, the leak needs to be addressed. This breaks down into two stages: improving capacity (gaining the raw strength required to properly check) and then neuromuscular control (applying this strength to the specific movement). Your ‘capacity’ is referencing the endurance/strength of the muscles that are limiting you. Take the running energy link above. The limiting muscles are the stance leg’s (the leg touching the ground) hip abductors which are responsible for preventing opposite hip drop. The building capacity stage would thus focus on improving these muscles’ strength and endurance to be able to check opposite hip drop. This looks like traditional exercise: you would do specific work for those muscles like side leg lifts and advance to more challenging movements like single leg Romanian deadlifts and single leg mini squats, all the way to single leg hopping (with no hip drop, of course). In addition to strengthening the muscles, specific exercise can also lead to hypertrophy which also makes the muscles naturally stiffer (like having a thicker spring) which gives some inherent checking power.
Sometimes you may already have the strength required and your form was just wrong, in which case, you can skip the building capacity stage. Here, all that is required is to deliberately practice the corrected form and do some drills.
Once sufficient capacity has been built, the nervous system has to be trained to use this strength in the movement. This is through neuromuscular drills. Once you have the energy leak identified, you need a cue to correct it (assuming you now have the strength to do so). Take the running energy leak again. A simple cue could be having them place their hands on their hips and having them focus on keeping the hips level. The drills can start off very simple and then they should advance to become more and more like the sports movement.
Now I’ll discuss this process for 2 common scenarios. First, hip drop while running. Second, general checking (basically just general core stabilization).
Checking opposite hip drop while running
- Limiting factor/weak link: stance leg frontal plane pelvic stabilizers (hip abductors, quadratus lumborum, and obliques)
- Building capacity – all the advanced movements must be performed with a level pelvis.
- Basic: side leg lifts, hip hikes, and single leg balance.
- Advanced: loaded carries, single leg Romanian deadlifts, and single leg mini squats.
3. Neuromuscular drills
- Basic (pre-running): march very slowly while keeping hips as level as you can.
- Intermediate (pre-running): set a metronome to 10 bpm slower than half your normal running pace (half because you’ll be doing only 1 leg at a time). Do mini single leg squats to the beat while keeping hips level the entire time. Perform sets of 15-30 reps. When you can perform with no hip drop, keep advancing the tempo until you can do a tempo that is at least half your normal running speed.
- Advanced (pre-running): Repeat the above drill only doing single leg hops instead. When you can perform without hip drop at your running tempo, place a small rope/marker down and repeat the drill only hopping over the marker from side to side with no hip drop.
- Basic running drill: run while keeping your pelvis relatively stable.
- Advanced running drill (for those whose sport includes sprinting and cutting which places even greater demand on frontal plane pelvic stabilizers): work on skater jumps (powerful single leg jumps from side to side, landing on the opposite leg each jump).
General checking: keeping the trunk stable while the arms and legs move.
- Limiting factor/weak link: trunk muscles responsible for stabilizing the spine.
- Building capacity
- Anti-extension (anterior muscles): supine marching to leg raises to ab bicycle to dead bug.
- Anti-sidebending (lateral muscles): side plank from knees then add reps of clamshell then reps of hip abduction. Advance to standing single arm and leg exercises.
- Anti-rotation (lateral muscles): Pallof press and any single arm exercises.
- Anti-flexion (posterior muscles): bird dog then bent over row and any style of deadlift or loaded hip hinge movement.
3. Neuromuscular drills
- Anti-extension is used to generally control excessive back arching. The goal is to be able to maintain your low back in a neutral position while lifting your arms overhead (stretching the lats) like in an overhead press and while straightening your hips out (stretching the hip flexors) like the back hip in a lunge. Both of those movements have a tendency to pull the back into an arch which needs to be checked by the abdominals. Start by practicing flattening back into a neutral position while lying on your back. Then add arm and leg movements while keeping this position (the building capacity drills above). Once you’ve mastered that, move into sitting and practice keeping the back in neutral while moving your arms and legs. Then advance to standing. The basic functional goal would be able to maintain back position while moving around and the advanced goal would be to be able to do so under load (which includes running as well as with weights).
- Anti-sidebending. For the legs, this is checking hip drop (see above). For the arms, this is carrying an uneven load, like a heavy weight in 1 arm down at your side (suitcase carry). This can be practiced with any variation of weight on 1 side: suitcase carry, rack carry (elbow bent), waiter walk (arm overhead), or uneven carry (like 10 lb in 1 hand and 20 lb in the other). The goal with all of these is to stay completely vertical with no bending towards the loaded side.
- Anti-rotation is generally used for swinging sports. The goal in swinging movements is to generate power in the hips, transfer this power through the spine and to the arms. To maximize power transfer through the spine, the core muscles must check the spine from energy leaks by preventing excessive rotation (which would ‘absorb’ force). To practice this movement, the unit turn is used. A unit turn is when the body rotates through the hips while keeping the spine relatively rigid. This means the hips and shoulders will face the same direction the entire time. If they ‘break’ from each other, then it means the spine over- or under-rotated which would be incorrect form for the unit turn. This can be performed using a cable/band for resistance or a barbell with one end wedged in the corner of the room/landmine device. You then hold on and practice rotating against the resistance while keeping your hips and shoulders facing the same direction the entire time.
- Anti-flexion is generally used for maintaining neutral posture under weight. Pretty much any standing loaded exercise has a component of this because the weight is almost always in front of your center of gravity which means it will be acting to pull you into a slumped posture. This most obviously applies to things like the deadlift and squat, but also to exercises like curls and shoulder raises. Therefore, anti-flexion can be trained with most exercises by setting your back in neutral position and actively keeping it there. Loaded carries such as the farmers walk and the Zercher carry (carrying something in the crooks of your elbows) are very helpful, especially because they require some sort of deadlift or clean to get the weight into carrying position.