fbpx

Strength programming

It’s not what you think officer. It’s, uh, chalk! Yea, chalk and it went up my nose you see…
This is a general run down of strength programming to lift heavy weights, starting from the simplest program and going to more complicated ones.
Linear periodization
This is very simple and if you are a beginner, you should definitely use this scheme because it is the fastest. All you do with linear periodization is keep your sets and reps the same (say 3 sets of 5 reps) and increase the weight each workout. For anyone new to an exercise, you will be able to rapidly increase how much weight you lift. The key is to increase the weight gradually, not to jump up to the heaviest weight possible. In the beginning, you will gain strength largely from your nervous system becoming more efficient and so practice is more important than pure load. Since you increase weight quickly, the load will catch up in no time, so there’s no point in rushing it.
 
At some point you will be unable to keep adding weight. It is generally recommended that you take a week off, then decrease the weight by 10% and start the process again. You’ll pass your first plateau and eventually get to a second one. You can repeat this process until you reach the same plateau twice. Then you will need to change your programming to keep making improvements.
 
Double linear periodization
This is an advanced version of linear periodization that gives you more time at a weight before moving up. You will have a goal number of reps and sets to complete, usually 5 sets of 5 reps. Each workout you try to get all of those reps and better than the workout before. So say last workout, you lifted 100 lbs for 5, 5, 4, 3, 3. This workout you would stay with 100 lbs and try to add at least 1 rep, like doing 5, 5, 4, 4, 3. Once you get to 5 sets of 5, you add weight and start back over. This slows down your linear progression to give your body extra time to recover.
 
An even more advanced way of doing this is called ‘back filling.’ This is when you ‘fill’ a set up with reps to equal the one before it while keeping all of the other sets with the same reps as last workout. An example:
Workout 1 – 9, 7, 5
Workout 2 – 9, 7, 7. The last set was ‘filled’ up to equal the middle one.
Workout 3 – 9, 9, 7. The middle set was ‘filled’ to the first one.
Workout 4 – 9, 9, 9. The last set was ‘filled’ to the middle one.
 
Once you reach your target, like 3 sets of 10, you can then add weight and start over. The advantage to this scheme is that perfect form is emphasized. Because you are not doing as many reps as possible, but often stopping from doing more reps, you can keep perfect form and not compromise.
 
Linear + rest day
This is similar to normal linear progression, but you insert a lighter day for recovery. If you were working out 3x/week with linear progression on Monday/Wednesday/Friday, then you could do a lighter day on Wednesday. This would be an active recovery day while you continued to progress on Monday and Friday.
 
Pyramid
This is similar to linear progression but the reps gradually decrease. You will start with more reps but lighter weight (the base of the pyramid) and gradually decrease the reps but add weight. Some lifters use this as their main programming, but its probably most often used when getting ready for a competition. In powerlifting, you only need to perform 1 rep so, as you get ready for the competition, you should train with lower reps and heavier weight. Using a pyramid program does this very naturally while allowing you to get a lot of volume in the beginning with the higher reps. An example might be:
3 weeks of 10 reps
3 weeks of 8 reps
3 weeks of 5 reps
2 weeks of 3 reps, 1 week of 2 reps
Deload week
Competition
**Each week you add weight so plan accordingly
 
Conjugate periodization
A plan very popular in the powerlifting community is conjugate periodization. This consists of 4 main workouts during the week: 2 for the upper body and 2 for the lower body. There are also additional workouts that can be added which are for general conditioning. The workouts for the upper body and lower body follow essentially the same plan. There is 1 workout for max effort lifts – meaning lifting as heavy as you can or close to it with low reps (1-3 reps). The other workout is dynamic effort – lifting with as much speed as possible with the intent to improve the body’s ability to develop force quickly. This is done with relatively lighter weight but often the addition of bands and chains to help teach the body to accelerate (because bands and chains add weight at the top of the lift so you’re forced to accelerate to lock the weight out). On both the max effort day and the dynamic effort day, accessory lifts that help add volume and address relative weak points are used and the workout is finished with the repetition method. This is similar to traditional bodybuilding where you use lighter weight and go for volume to build muscle.
 
Explaining conjugate periodization is too complicated to cover briefly here, but there are some very good resources online and on YouTube. It is a very intense method and is probably best done in a group. The reason is that on the max effort days (when you go for a new record), you will almost always do better when competing with, and being fueled by, other lifters. I believe that a large component of this periodization’s success comes from the atmosphere of the gyms which allows lifters to truly get the most out of the max effort day. Its possible to be intense when working out by yourself, but it is much harder to reach that consistent level of motivation.
 
Wavy periodization
Finally, my favorite periodization – wavy periodization. It’s called that because the number of sets, reps, and the weight lifted all vary from workout to workout. The scheme I use is one I made based on Prilepin’s research. Prilepin was the coach of the USSR’s Olympic weightlifting team. He compiled a lot of data on his lifters which has been boiled down to “Prilepin’s chart” which can be found via a simple Google search. While the charts always show the number of sets and reps that should be used at a certain intensity of your 1 rep max (1RM), they rarely show how often you should train at that intensity.
 
If you’re writing your own program, though, that is very important so you can plan it out correctly. I’ll include the relative time you should spend training at the intensity range below.
55-70% for 18-30 total reps, 10% of your training cycle.
70-80% for 12-24 total reps, 60% of your training cycle.
80-90% for 10-20 total reps, 25% of your training cycle.
90+% for up to 10 total reps, 5% of your training cycle.
 
As you can see, most of the time is actually spent in the 70-90% intensity range, with testing maximal strength (90+%) basically only once per cycle. To determine the sets and reps you’ll use, I pretty much go with half of that intensity’s rep max. So if you can lift 75% of your 1RM for 10 reps, then you’ll do sets of 5 reps. At 75% you should do 12-24 total reps, so this would translate into 3-5 sets of 5 reps. I generally recommend you always start with lower volume rather than higher volume. If you get a good training effect from lower volume, you should do that until you no longer make improvement. Then you can increase your volume.
 
Now the other recommendation with this periodization is that you change the main movement you’re training with every 3 weeks to avoid nervous system fatigue. To make a program with this information, then you just have to decide if you want to train 2/week or 3/week. If you train 2/week, then you will have 6 total workouts which means 1 session at each intensity range except 70-80% which has 3 sessions. If you train 3/week, you’ll have 9 workouts which will be 1 at 55-70%, 5 at 70-80%, 2 at 80-90%, and 1 at 90+%.
 
A final component of writing the program is adding the wavy nature. I like to make it as different week to week as I can, so that almost every workout you do a different number of reps, sets, and weight.
For a 2/week cycle over 3 weeks:
  1. 3×6 (3 sets of 6 reps) @ 70%
  2. 5×3 @ 85%
  3. 4×6 @ 65%
  4. 4×4 @ 80%
  5. 3×5 @ 75%
  6. Test 1RM: 1-3 PR attempts
 
For a 3/week cycle of 3 weeks:
  1. 3×6 @ 70%
  2. 5×3 @ 77.5%
  3. 4×4 @ 80%
  4. 3×5 @ 75%
  5. 5×3 @ 85%
  6. 4×5 @ 75%
  7. 3×6 @ 60% (deload before PR)
  8. Test 1RM: 1-3 PR attempts
  9. 3x4x72.5% (lighter workout after 1RM test)

Squat form determinants

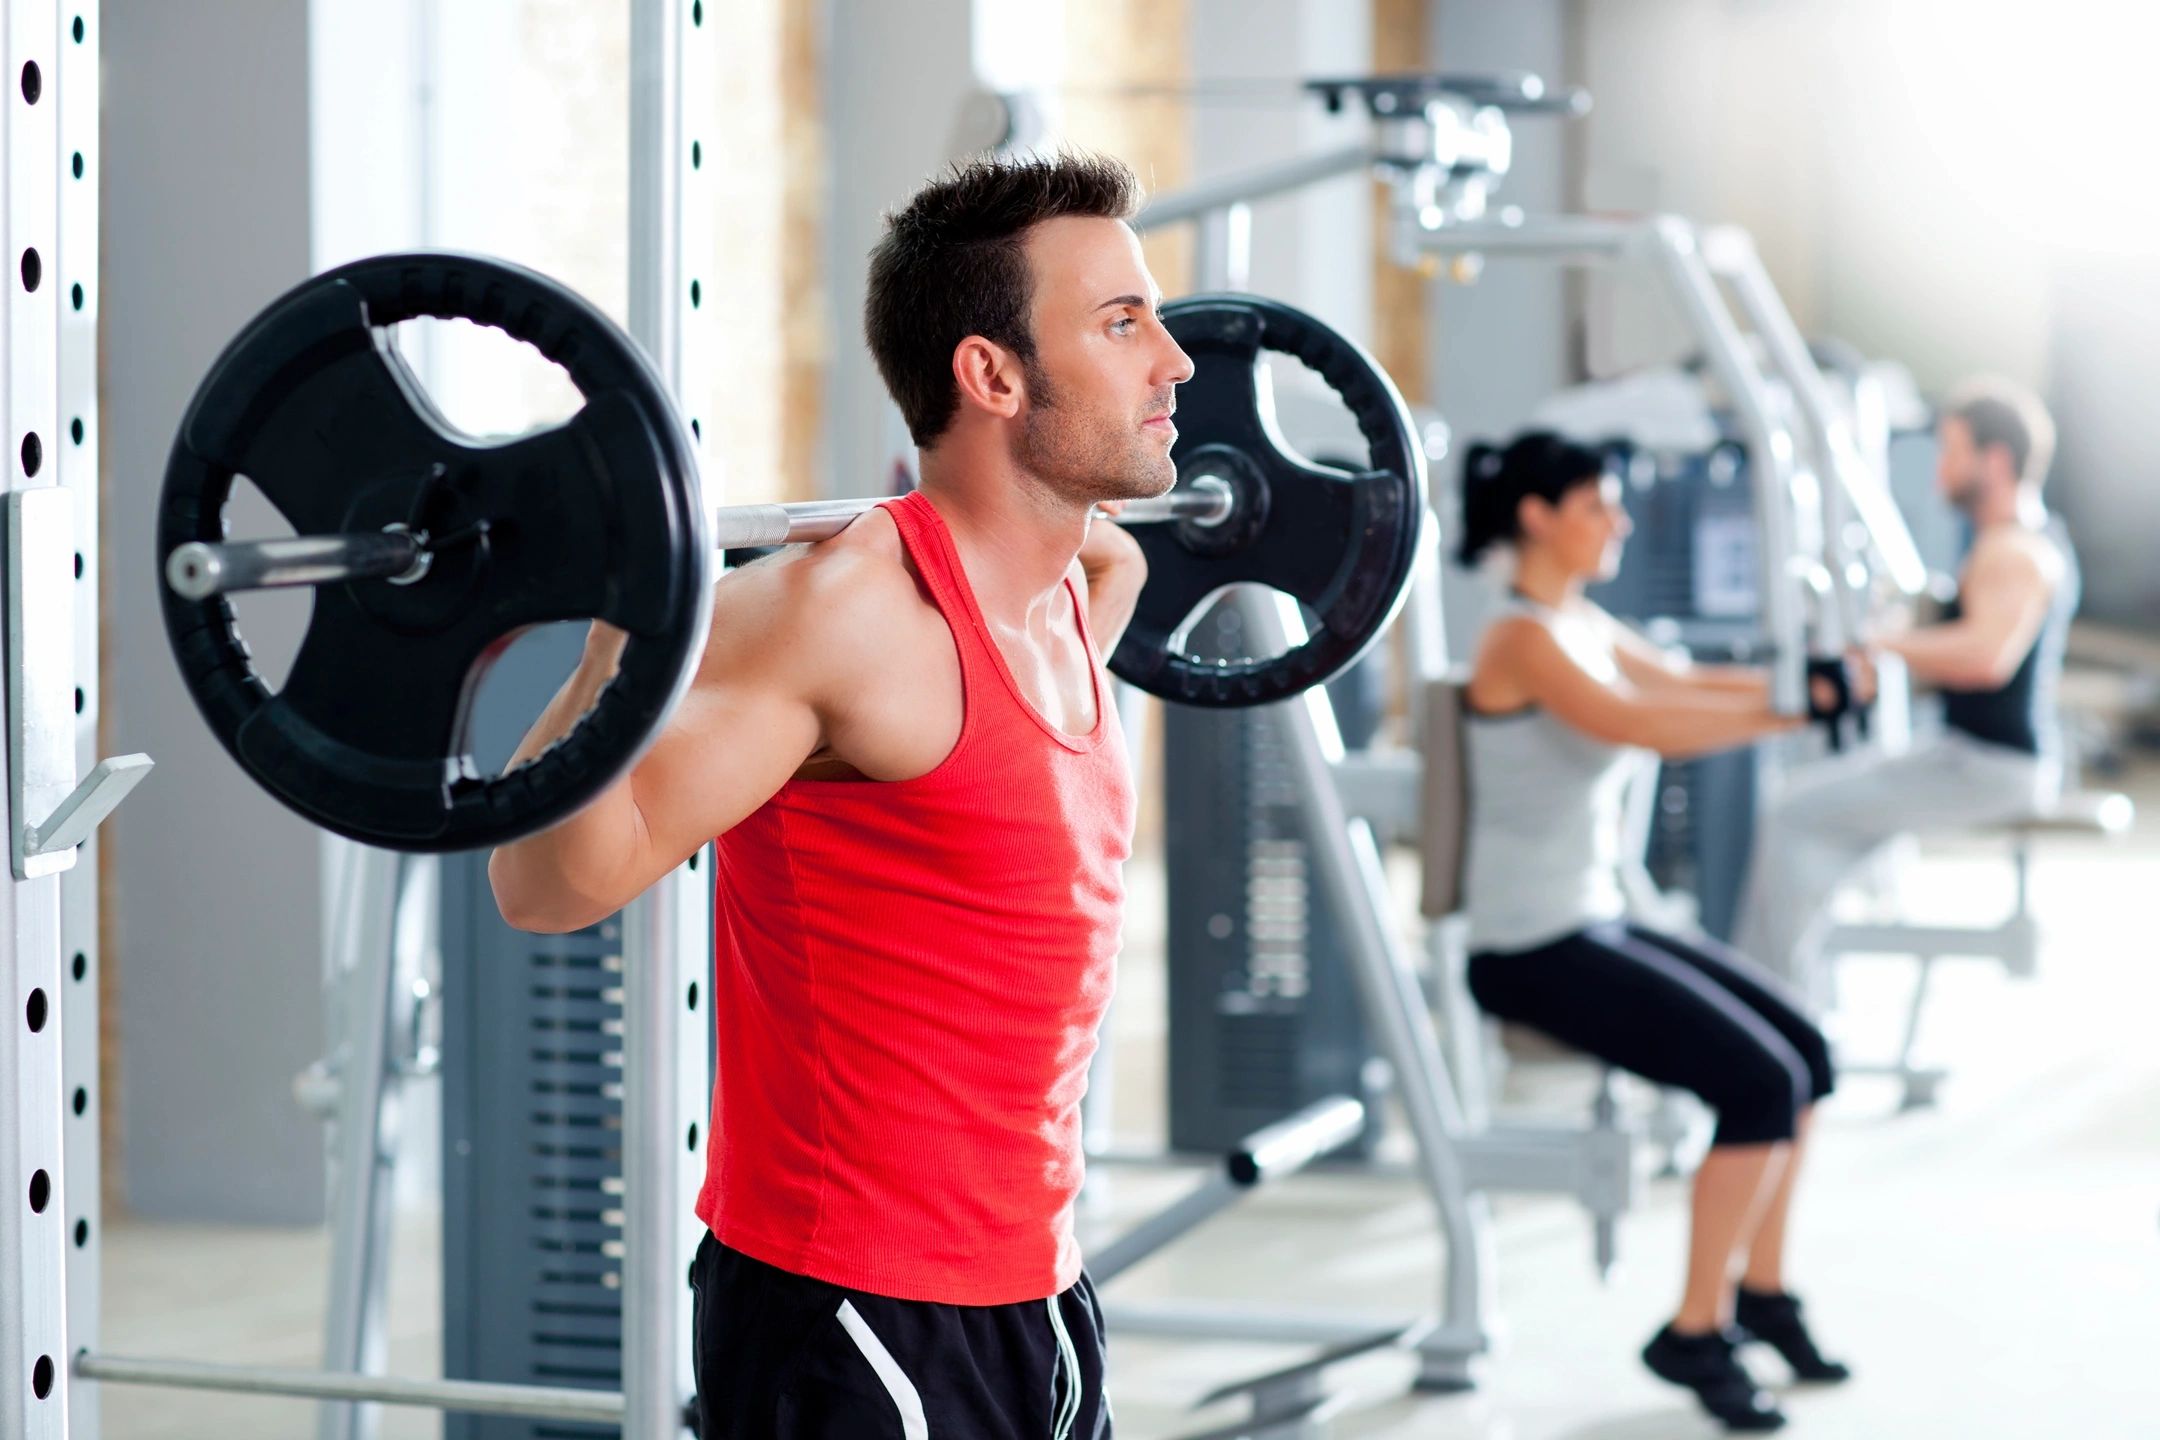
Step 1 to maximize weight on the bar: find lightest, thinnest bar possible.
At some point, all weight lifters must bend the knee to serve the king of exercises – the squat. The question then is, how to best serve?
 
First, this guide isn’t for Olympic lifters. If you’re an Olympic lifter, your only goal is to squat as similarly to the recovery phase of the clean or snatch as possible. This means your form doesn’t have much leeway – your stance should be the same as your catch stance, you should squat as deep as you physically can, and your trunk must stay completely vertical.
 
If you’re not an Olympic lifter, then this guide can help you. This isn’t a guide on what good form is, but rather a guide on how to find a form that works for you. It requires experimentation aka working out. To do so, you should adopt a program that switches the main squat exercise every 3-4 weeks so you can try out many different things. A very simple way to do this would be to pyramid up over the 3-4 weeks. Start with higher reps like sets of 8-10, then next week add weight and go to 6-8 reps, then 4-6 reps, then 1-3 reps. After you work up to this last week of heavy weight, change your squat form slightly and start back over.
 
Making adjustments
If you’re just learning to squat, you’ll need feedback to know when you should adjust things. This can be a friend who watches you from the side so they can tell you how you look. Or you can film yourself from the side. One of the best systems that will give you feedback in real time is using a phone and a tablet at the same time. Set your phone up to view you from the side and put the tablet in front of you so you can see it while you squat. Then you’ll use your phone to make a video call to the tablet. This way, you’ll be looking at the tablet which will be showing the footage of yourself squatting from the side. This will let you know if you’re squatting deep enough, how your bar path looks, and other form details.
 
Stance depth
This will be defined as when the hip crease is below the top of the knee. This is a standard definition.
 
Grip width
Grab the bar in the widest position possible. Notice the amount of upper back tension you have. Now slide both your hands in as far as you can and reassess your back tension. A lot more with them in, right? You want as much tension as you can. Most people will be limited by shoulder mobility. Get under a bar and pull into the bar like you’re trying to bend it and wrap it around your body. Gradually work your hands in. Experiment between as wide as you can grip it and as narrow as your shoulder mobility allows. Somewhere in there you’ll find a range that maximizes both your upper back tension and your pulling tension. Leave your hands here and step back from the bar. Take a note of where your hands are relative to the knurling.
 
Stance width
There are 2 things to account for with choosing how wide your stance is. Both of them occur in the bottom position of the squat. You want to pick a stance that is as wide as comfortably possible and that allows you to reach proper depth without your low back rounding. Proper depth and keeping the back in neutral are both important. You might be able to take a wider stance and reach depth but not keep your back in neutral. This isn’t good and you should narrow your stance slightly. Most people will end up with a stance that is 1.25x-1.5x shoulder width. The stance should also be relatively comfortable – if it feels like your hips are under too much strain in the bottom position, narrow your stance because there’s likely too much shear force on your hips.
 
Bar path
The bar path is determined by how you squat. There are 2 extremes: as deep as possible with trunk more vertical and as shallow as possible (while still reaching depth) with the trunk more horizontal. The more shallow squat will look like a box squat with the knees not moving forward much at all. While the shallow squat requires moving the weight the least distance, many lifters just aren’t built for this style in it’s most extreme form. Therefore, you should start with this style and then gradually experiment by letting the knees come forward a bit. Do a few cycles where you change this a little bit more each time. You’ll either find that with slightly more knee bend you can squat more or there’s a drop off in strength.
 
An important cue with bar path is keeping the bar directly over the middle of your foot. Often lifters will lean over too much which results in the bar being too far forward which is very disadvantageous. A good visual cue is to tie a rope to the collar of the barbell and let it hang down to the floor. It should touch the ground right at the middle of the foot.
 
 
Leg position
Many people try to push their knees out when they squat, often to prevent them from collapsing inward. This cue is fine, though often the real problem is they either are folding too far over or the weight is too heavy. First, make sure that you’re keeping the bar directly over the middle of your foot while squatting. This often means being slightly more upright that you might realize. If that doesn’t work, then there’s an easy fix: decrease the weight.
 
The other question is should the toes point forward or out? Pointing the toes forward improves the rebound out of the bottom of the squat because of a greater hamstring stretch, but adds more torque to the knee. So this is a matter of personal comfort with how much torque you’re willing to place on the knee. If you don’t want to do that, then most will agree that pointing the toes about 10 degrees outward puts the knee in a comfortable position.
 
Summary
  1. Find the grip width that maximizes tension within your available shoulder mobility.
  2. Find the widest stance width that you can comfortably achieve proper depth with a neutral low back.
  3. Experiment with different squat styles, ranging from box squat style (knees don’t move forward, trunk more folded over) to a hybrid squat style (knees do move forward some distance, trunk more upright). Find the style that you’re strongest with.

Maximus your gluteus

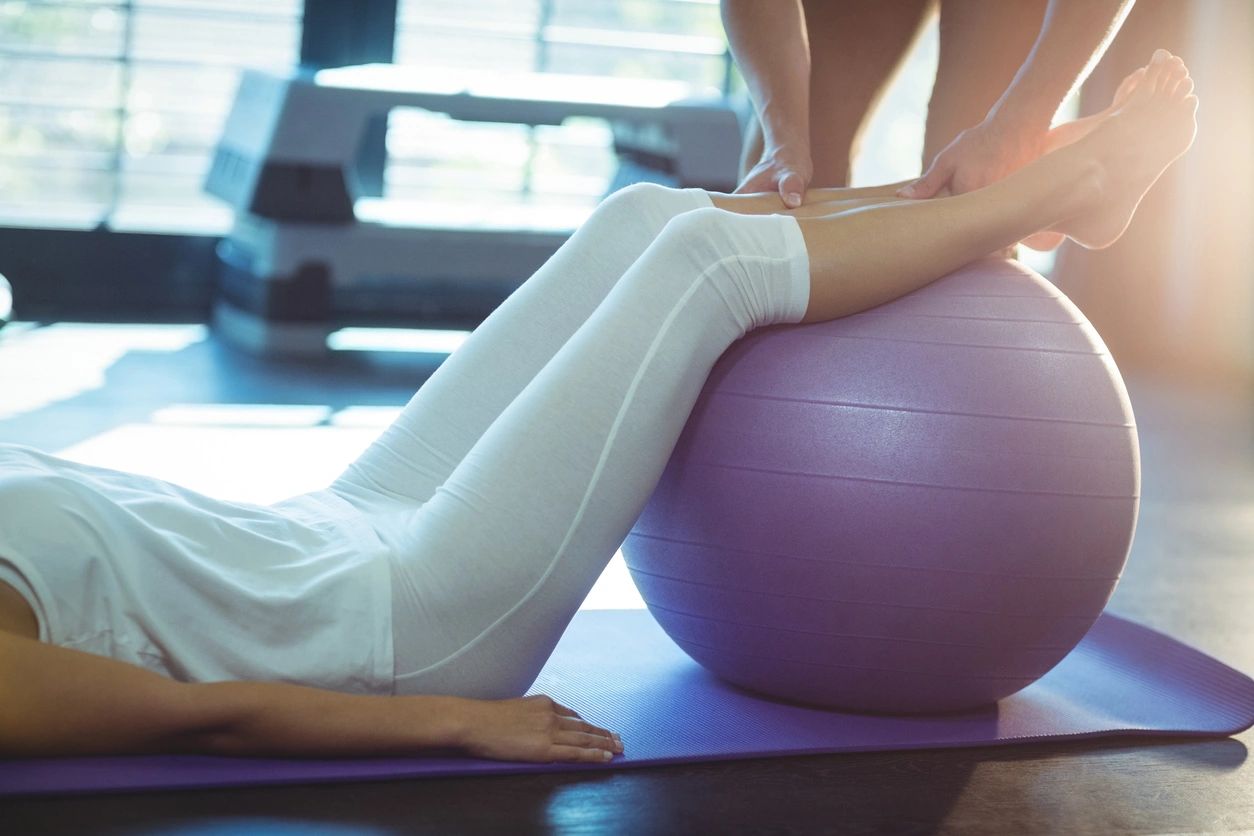
Functional training for those situations where you lie on your back with your legs on a ball and have to move your body.

If you run, jump, swing a racket/club/bat, or punch or kick – your glutes need to be maximus. When you powerfully shift your weight – your glutes are providing that power. Read on to learn how to squeeze the crap out of your glutes (metaphorically)!

First, when is glute max active? Basically anytime you’re straightening your hip. This can be done without weight bearing like kicking your leg backwards, but obviously in sports (and life in general), it’s mostly done while weight bearing. Straightening the hip in weight bearing is shifting your weight forward which is used with pretty much most standing movement. Additionally, anytime you’re swinging your arm (golf, racket sports, baseball, combat), you generate power in the hips by shifting your weight which once again comes from the glutes.

To activate your glutes, start with a shoulder-width stance and turn your feet slightly outwards. It can help to put your hands on your butt so that your fingers can feel the muscle activating. Now lean very slightly forward, just so that your head is an inch forward. From here, roll your hips/pelvis under like you’re tucking your tail. You will feel your glutes kicking on. Just follow this contraction by squeezing your butt as hard as you can, to the point it almost feels like it will cramp. Hold for a few seconds then relax. That is activating your glutes.

Now, for training. You’ll want to both get your glutes stronger as well as learn to activate them powerfully. To do this, simply perform this glute activation drill at the end of each rep of your standing exercises. After each squat, each deadlift, each kettlebell swing/clean/snatch, after each bridge – squeeze until your glutes feel like they will cramp. At first, it will likely take a few seconds to reach this amount of force because your glutes aren’t used to fully activating. After a few reps though, you will be able to do this very quickly. This will not only strengthen your glutes but teach your body to contract them fully and faster. Warning: this will make your glutes very sore the next day. You’ve been warned…

That can be done with any exercise where the feet are symmetrical. However, it can and should be done with exercises where the feet are asymmetrical as well, such as lunges, step-ups, single leg deadlifts, kickbacks, and so on. Any exercise with a split stance with both feet on the ground, you’ll squeeze the back hip at the top of each rep.

It is crucial to understand that glute max really shines when the leg is behind the midline of the body/trunk. This is important for pretty much all sports movements. Whenever you run or strike something, the back leg needs to be behind the trunk. Many runners bounce up and down which wastes energy as well as loads the knee more. Instead, pushing the body forward or pushing the ground backwards (they accomplish the same thing) with an upright posture and the leg finishing behind the body, will ensure more efficient push-off.

For any striking motion during a sport (golf swing, racket swing, punch, etc.), you can practice squeezing the back leg’s glute. This will not only add power to your weight shift and rotation, but teach your body to make this automatic.

Once you have true mastery of activating your glutes powerfully and quickly, you should then work on pulsing your contraction at the moment just before, and through, impact. A pulse being a strong, but quick squeeze. You’ll want to pulse both your core and your back glute at the same time. Don’t be surprised by the amount of force and snap this adds to your strike!

Lower body exercises

They have each invoked “squatter’s rights” to claim this area. It will be a heated battle.

When choosing what to include in your plan, there are a bunch of categories people want to straddle. I’ll go over what I’ve chosen and why.

Static vs. Dynamic

Static movements are ones where you stay relatively in the same space, often with your base planted and unmoving. Examples would be squats, lunges, deadlifts, and cleans. Dynamic movements are where you move around like in sled drags, car pulls, walking lunges, and loaded carries. Static movements tend to build greater limit (absolute) strength while dynamic movements tend to build greater stability and power. For example, the 2 kings of limit strength are squat and deadlift, both statics, while some of the most well known power movements, jumping and sprinting, are dynamics. However, there is a lot of overlap. For example, cleans, snatches, and kettlebell swings are all static movements that build tremendous power; while a car pull or heavy sled drag, both dynamics, build a huge amount of strength. Static exercises are also much more convenient – you can do squats anywhere but you can’t pull a car anywhere. Most gyms you could easily deadlift, even if it’s just with dumbbells or a Smith machine, but you can’t do sandbag carries or other loaded carries due to limited space or equipment.

That being said, I personally prefer dynamics for almost all of my lower body training. The reasons are three-fold. First, I don’t compete in any strength competitions, therefore I don’t have to try to maximize my squat or deadlift for a single rep. If you do, then you absolutely have to train static movements. But since I don’t, I train heavy dynamics that involve a similar static pickup. I do heavy farmers walks which involve a deadlift to start. I also do the yoke carry which involves a squat to start. Both of these are much higher than normal, the farmers walk pickup being essentially a high handle trap bar deadlift and lifting the yoke requiring just a quarter squat. Therefore, the carryover to the full range of motion movement is somewhat limited, but still useful. Second, I find dynamic movements much more useful to real life tasks, more interesting, and more fun. Third, a well-rounded program would have both static and dynamic movements, but I enjoy being a minimalist. Doing heavy dynamic movements will have more carryover to static movements than the reverse.

Movement patterns

Generally, most would classify the 2 main movement patterns of lower body exercises as the squat (knee-dominant) and the hip hinge (hip-dominant). However, this applies more to static movements. Instead, I do loaded carries and resisted locomotion (sled/car work) which I call load-con-motion or LCM. For carries, I use either farmers walk implements, a heavy sandbag, or the yoke. For LCM, I use either a sled or a car. There are many exercises and variations you could do with all that equipment, but I also keep that to just a few variations, covered below.

Intensity and range of motion

The smaller the range of motion (ROM), the more weight you can use. You can squat more with powerlifting style squat vs. Olympic style, just like you can quarter squat more than half squat. While you could do a high intensity lift with a large ROM, like doing a heavy triple with an Olympic style squat, I generally prefer to keep the division clean and just do heavy, smaller ROM exercises and faster, large ROM exercises. For example, with the loaded carry, I do heavy farmers walks. The handles are relatively high, meaning the ROM is small, but I tend to do these heavy. On the other hand, I also do sandbag clean and carry, either in my arms or on 1 shoulder. To clean a sandbag from the ground, you have to go lower than a standard deadlift (greater ROM), so I use much less weight but emphasize power. Sometimes I do mix it up by doing lighter farmers walks for longer distance and heavy sandbag carries, but this is much less frequent. The same goes for my LCM exercises. Since the sled is lighter than the car, I mostly do overhead sled sprints, which have much more leg ROM. They are light, but fast. There are many sled pull variations – I almost exclusively do light overhead sled sprints. On the other end, I do heavy car pulls.

Programming

So all of the above essentially explains my exercise selection. I work out 2 times per week so I vary which dynamic I do from workout to workout, and I generally decide if it’s a heavy grind or a lighter sprint on the day of my workout. Heavy dynamics are incredibly fatiguing on the body, so if you feel fatigued or tired throughout the day, then just listen to your body and switch to at least 2-3 workouts of lighter, faster work. You could plan each workout in advance, but I find that listening to your body helps keep motivation higher since you push less into overtraining. That being said, here are the movements I use:

  • Overhead sled sprint: light weight, fast speed
  • Car pull using a harness: I mix it up between using a rope assist and no rope
  • Sandbag clean and carry: I’ll clean it to chest level and do either bear hug or Zercher (carrying it in the crooks of your elbows) carries or to shoulder height and walk with in on my shoulder
  • Farmers walk and yoke carry: these are programmed similarly. Really heavy for short distance, heavy for medium distance, or moderate for as far/as long as possible

When combined with my upper body exercises, a workout will generally be a pushing movement, a rowing movement, and one or two of the above lower body movements. Then, we’ll do a few rounds of boxing drills for conditioning.

Playing with yourself from the waist up

From years of checking under her bed every night, she grew strong… now SHE is the monster…

If playing with yourself is too easy, that is, if it doesn’t leave you in a hot, sticky mess, then you’re probably ready to increase the intensity of your stimulation. There are a couple of was of changing bodyweight upper body movements to challenge your muscles in new and titillating ways.

Adding weight

This is a pretty straightforward one. Just add weight to the movements you’re already doing. With pull-ups and dips, you can use a weight belt or hold a dumbbell between your legs. With rows and push-ups, you can also use a weight belt, but instead of putting it around your hips, you put it at chest level, just below nipple lane. This method makes it much easier to load the movement without requiring someone else to help you, and it doesn’t interfere with arm movement. You will also want to elevate yourself with pushups and rows. For pushups, this means placing your hands on boxes, benches, or even dip bars while having the feet also supported by a box or bench. For rows, it just means putting your feet up at hand level.

Increase speed

Plyometric exercises are also very challenging and train your ability to develop force quickly (power). With pushups, you’ll press up fast enough for your hands to leave the ground. Often people will do something with their hands to increase speed even more, such as slapping your chest or clapping your hands together. The same thing can be done with rows and pull-ups – pull fast enough for your hands to leave the bar. Just make sure you’re doing this as safe as possible in case you miss the bar. This means doing pull-ups at a bar height where if you fall it’s just a few inches for your feet to touch down. The same goes for rows, with extra care to put down a padded mat beneath you. As someone who did a plyometric row from a high bar and ended up falling several feet onto a hard floor and getting a closed skull fracture, I can assure you that intelligent safety planning is aldkfjasd.

Unilateral variations

The one arm pushup, row, and pull-up are all glorious exercises to strive for, but you don’t have to be anywhere near close to doing them fully to take advantage of unilateral variations for greater strength and stability gains. First, you can go to an uneven hand placement. For pushups, this can be placing one hand on a box, handle, stack of books, or even a ball. For pull-ups and rows, you can use a normal pull-up bar and just add a handle to it to lower it on one side. A simple way of doing this is wrapping a towel around the bar and hanging onto that with one hand while the other holds the bar. This is also a great grip builder. The other variation is the archer variation. Here, you place your hands wider than normal and then as you do the exercise, you shift your weight towards one hand. A full rep of the archer variation will have all or almost all of your weight on that hand at full depth (the bottom of the pushup or the top of the pull-up and row). With all unilateral training, its important to train your weaker arm first.  If you start on the stronger side and do 10 reps but can only do 8 reps on the weaker side, you’ll just be reinforcing asymmetry.
Start on the weaker side and whatever you do on that side, match it on the stronger side to ensure symmetry.

Stability

This is very simple: use rings or some sort of suspension apparatus. Anything that hangs down is unstable, which is great for training, while also allowing free rotation of the hands – a double win. Rings can be used for pushups, pull-ups, rows, dips, and many other bodyweight exercises. While you can buy gymnastic rings and mount them into your ceiling, I started out just using rope to hang 6″ sections of PVC pipe (as handles) from a doorway pull-up bar.

Changing the leverage

With the upper body, you have two main moving joints: the shoulders and the elbows. You can shift where your hands are to change how much focus you put on the muscles of the shoulders and the elbows. For the pushup, the main muscles are the pecs (the chest), the anterior deltoids (front of shoulder), and the triceps. To hit the pecs more, you can move the hands to a wider position and do reps, or move them to a narrow position and let your elbows point out to the side. To hit the anterior deltoid more, move your hands closer towards your hips so that your arms actually angle backwards underneath you. To hit the triceps more, move your hands up towards your head or even further, which will result in a pushup that almost exclusively occurs at the elbow joint. Alternatively for the triceps, you can also make a diamond with your hands touching and this will also emphasize the triceps.

For the row, the main muscles are the lats, the scapular retractors (muscles of the middle of the back, between the shoulder blades), and the biceps. To emphasize the lats, row with your hands low towards your hips. To hit the middle of the back, try to finish with your hands in a wide position. To hit the biceps more, first grab the bar or the rings so that your palms are facing your head (supination). Then, row your hands towards your face by primarily bending your elbows.

Plane of movement

The upper body movements tend to be broken down into horizontal push/pull (pushups, rows) and vertical push/pull (handstands, dips, pull-ups). Many people are unable to jump directly into handstand pushups and full pull-ups or even full pushups from the ground and bodyweight rows, but fortunately, the horizontal movements lend themselves towards easier progressions very naturally. The ‘standard’ pushup and row has your body only slightly inclined, relative to horizontal. You can make both of them easier by moving more upright. A pushup can be started by standing and leaning into a wall. The body will be almost vertical. As you get stronger, you can move your hands lower and lower down the wall, or transition to hands on a couch or low table. The row progression is the exact same, with the easiest variation having the body almost vertical. This can be accomplished using rings easily. It can also be done at a gym by using a Smith machine – the machine with a barbell on rails. Start with the bar high and gradually lower it as you get stronger.

By varying these components, you can make your movements harder and alternate through new things to keep challenging the body in different ways. For example, you don’t have to just try to progress the pushup to a 1-arm pushup. You can also go for heavy weighted pushups, higher and higher explosive pushups, and planche or freestanding handstand pushups. I’ve left one other variation, transition movements, off this list for now since it’s a hybrid movement and I’ll cover it next post.

Check please!

Training for the annual “Dine ‘n Dash 5k” – a race hated by many in the food industry

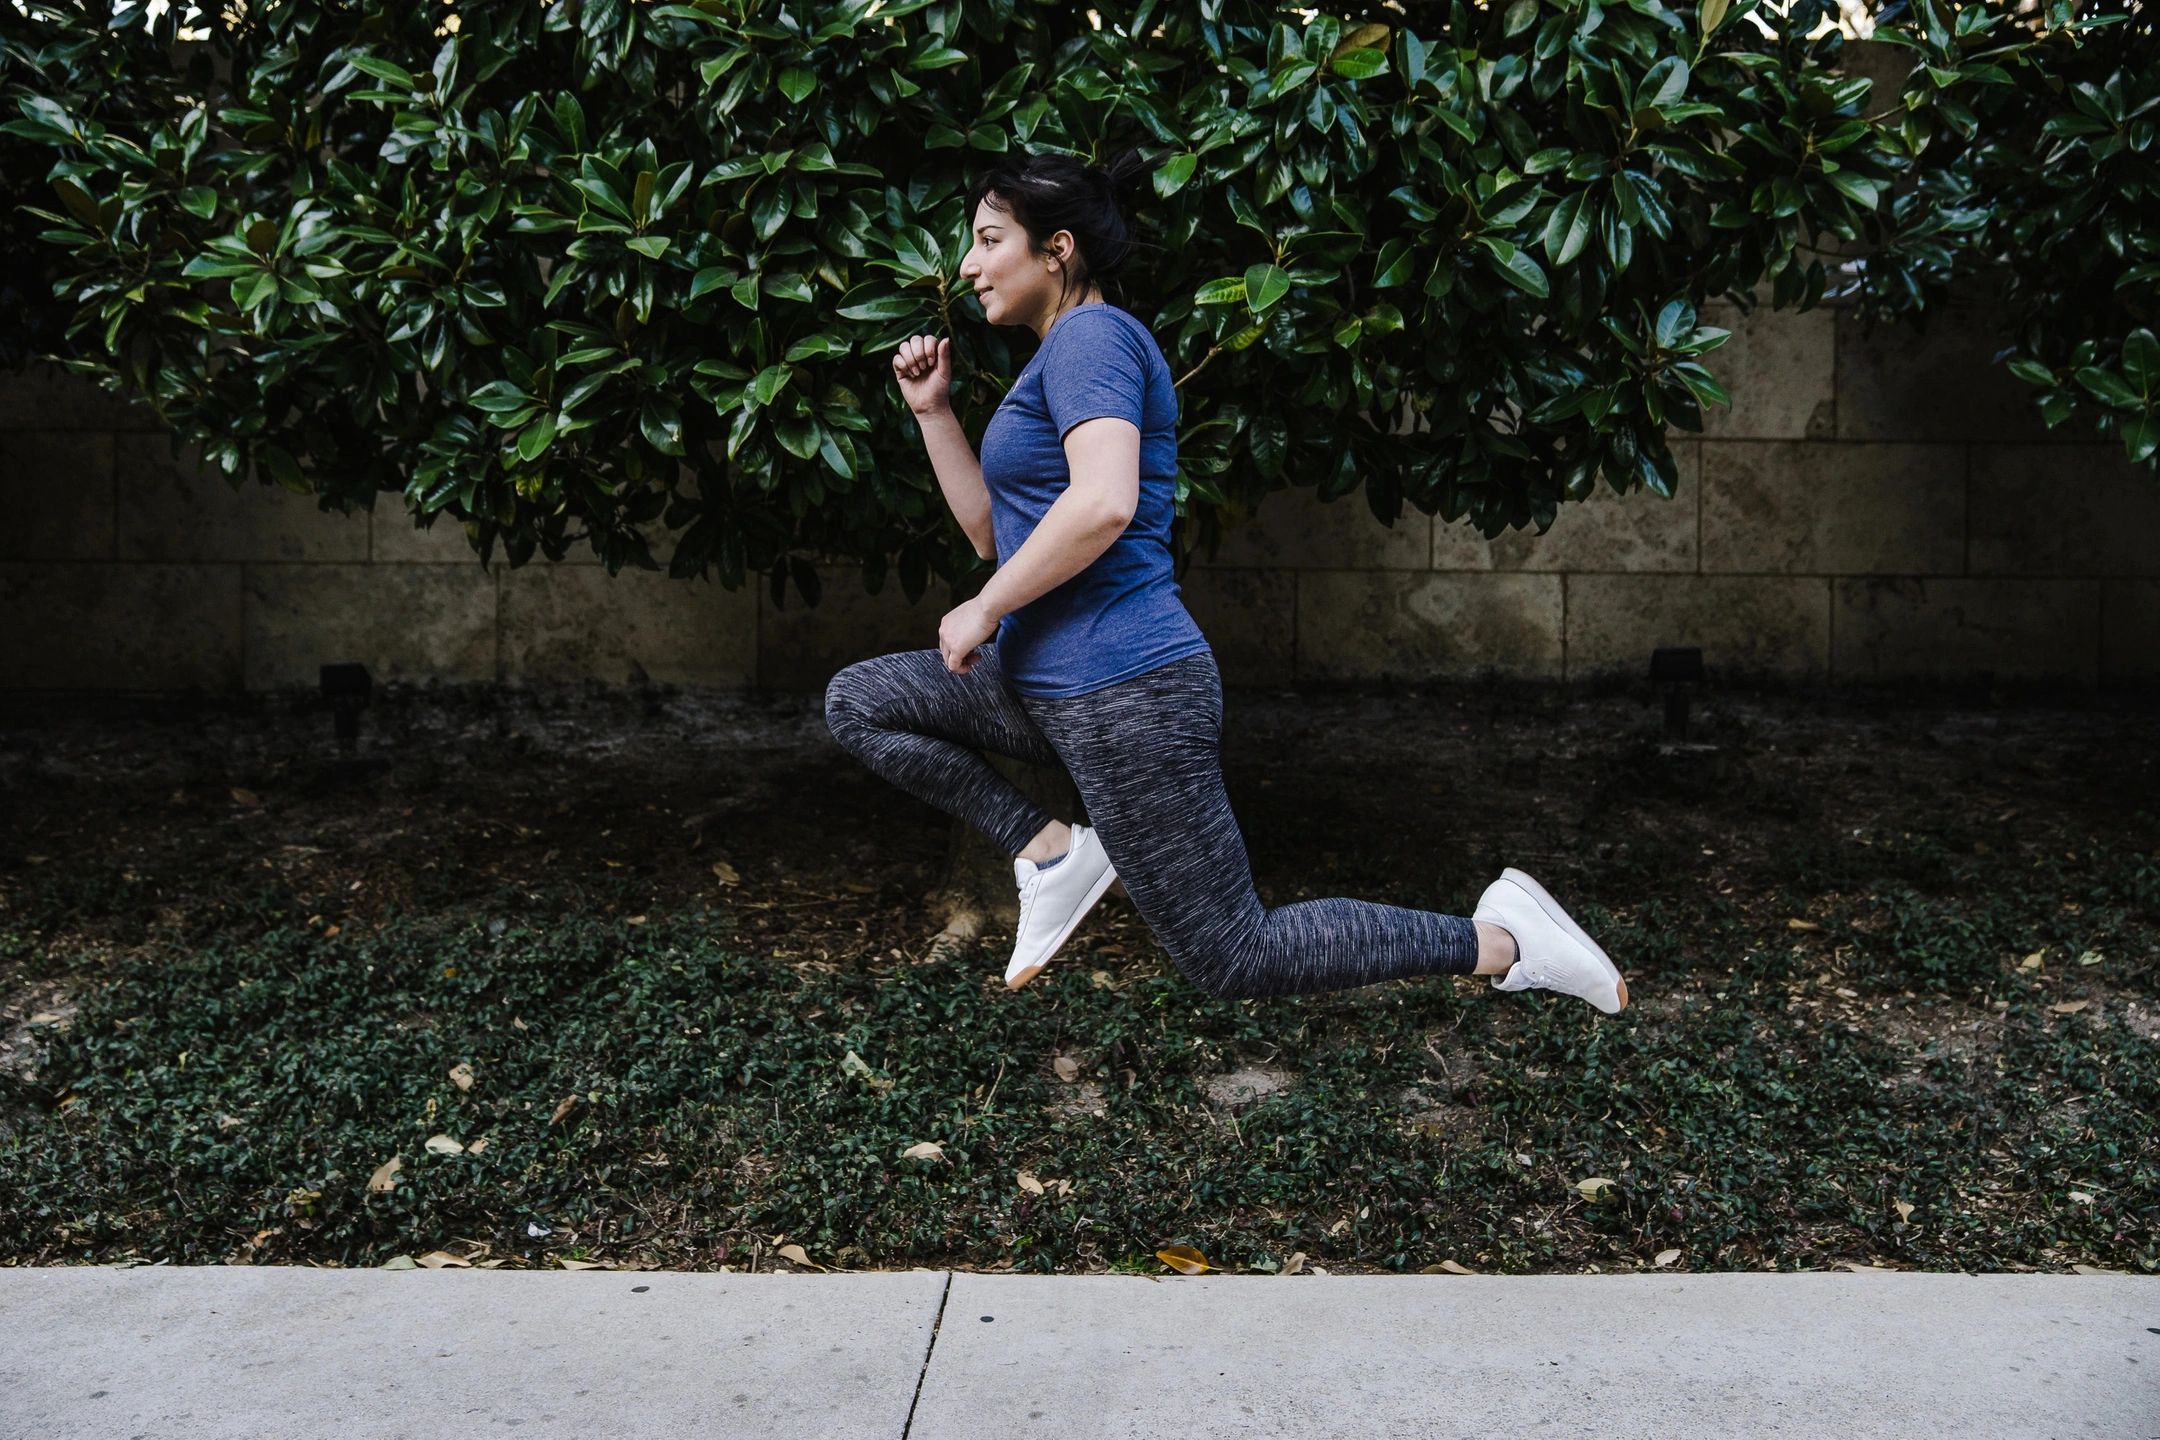
Are you tired of leaking all of the place when you run? Leaking energy that is. Energy leaks  are when you perform a movement without proper stabilization, resulting in less than optimal force transfer. Imagine trying to stand up as fast as you can from a really puffy chair. You won’t be able to go as fast because the cushion will absorb much of the force. Compare that to standing from a wooden chair – you’d be able to jump right up because the firm surface is stable and transfers all the force you apply to propelling yourself upward. In any athletic movement, a general goal is to maximize force transfer – resulting in a faster throw, a higher jump, a harder hit, etc. I call this general function of the core ‘checking’ (to keep something in place). It differs from pulsing and bracing in that it generally is an automatic function (whereas the other two, you consciously contract your core). To improve energy leaks, they must first be identified – then movement-specific checking can be addressed.

Identifying energy leaks generally requires consulting someone who can analyze your form. This could be your coach, a workout partner, or even yourself by analyzing video of yourself. Energy leaks can be spotted because a visible ‘collapse’ happens in the movement. With running, this is often apparent when the swing leg side (the side that is not touching the ground) ‘collapses’ a few inches instead of keeping the pelvis more level. With any swinging movement (golf, tennis, fighting, baseball, etc.), it’s often seen as the hand(s) contacting the object relatively too late in the swing because the hips rotated faster than the core could check the rotation (the crucial anti-rotation strength that allows the power generated in the hips to be transferred to the arms which then amplify the power by acting as a whip due to the longer levers of the arms). This article won’t go over how to identify energy leaks because it’s much too movement dependent, but it’s usually best to seek an outside perspective.

Next, the leak needs to be addressed. This breaks down into two stages: improving capacity (gaining the raw strength required to properly check) and then neuromuscular control (applying this strength to the specific movement). Your ‘capacity’ is referencing the endurance/strength of the muscles that are limiting you. Take the running energy link above. The limiting muscles are the stance leg’s (the leg touching the ground) hip abductors which are responsible for preventing opposite hip drop. The building capacity stage would thus focus on improving these muscles’ strength and endurance to be able to check opposite hip drop. This looks like traditional exercise: you would do specific work for those muscles like side leg lifts and advance to more challenging movements like single leg Romanian deadlifts and single leg mini squats, all the way to single leg hopping (with no hip drop, of course). In addition to strengthening the muscles, specific exercise can also lead to hypertrophy which also makes the muscles naturally stiffer (like having a thicker spring) which gives some inherent checking power.

Sometimes you may already have the strength required and your form was just wrong, in which case, you can skip the building capacity stage. Here, all that is required is to deliberately practice the corrected form and do some drills.

Once sufficient capacity has been built, the nervous system has to be trained to use this strength in the movement. This is through neuromuscular drills. Once you have the energy leak identified, you need a cue to correct it (assuming you now have the strength to do so). Take the running energy leak again. A simple cue could be having them place their hands on their hips and having them focus on keeping the hips level. The drills can start off very simple and then they should advance to become more and more like the sports movement.

Now I’ll discuss this process for 2 common scenarios. First, hip drop while running. Second, general checking (basically just general core stabilization).

Checking opposite hip drop while running

  1. Limiting factor/weak link: stance leg frontal plane pelvic stabilizers (hip abductors, quadratus lumborum, and obliques)
  2. Building capacity – all the advanced movements must be performed with a level pelvis.
  • Basic: side leg lifts, hip hikes, and single leg balance.
  • Advanced: loaded carries, single leg Romanian deadlifts, and single leg mini squats.

3.   Neuromuscular drills

  • Basic (pre-running): march very slowly while keeping hips as level as you can.
  • Intermediate (pre-running): set a metronome to 10 bpm slower than half your normal running pace (half because you’ll be doing only 1 leg at a time). Do mini single leg squats to the beat while keeping hips level the entire time. Perform sets of 15-30 reps. When you can perform with no hip drop, keep advancing the tempo until you can do a tempo that is at least half your normal running speed.
  • Advanced (pre-running): Repeat the above drill only doing single leg hops instead. When you can perform without hip drop at your running tempo, place a small rope/marker down and repeat the drill only hopping over the marker from side to side with no hip drop.
  • Basic running drill: run while keeping your pelvis relatively stable.
  • Advanced running drill (for those whose sport includes sprinting and cutting which places even greater demand on frontal plane pelvic stabilizers): work on skater jumps (powerful single leg jumps from side to side, landing on the opposite leg each jump).

General checking: keeping the trunk stable while the arms and legs move.

  1. Limiting factor/weak link: trunk muscles responsible for stabilizing the spine.
  2. Building capacity
  • Anti-extension (anterior muscles): supine marching to leg raises to ab bicycle to dead bug.
  • Anti-sidebending (lateral muscles): side plank from knees then add reps of clamshell then reps of hip abduction. Advance to standing single arm and leg exercises.
  • Anti-rotation (lateral muscles): Pallof press and any single arm exercises.
  • Anti-flexion (posterior muscles): bird dog then bent over row and any style of deadlift or loaded hip hinge movement.

3.  Neuromuscular drills

  • Anti-extension is used to generally control excessive back arching. The goal is to be able to maintain your low back in a neutral position while lifting your arms overhead (stretching the lats) like in an overhead press and while straightening your hips out (stretching the hip flexors) like the back hip in a lunge. Both of those movements have a tendency to pull the back into an arch which needs to be checked by the abdominals. Start by practicing flattening back into a neutral position while lying on your back. Then add arm and leg movements while keeping this position (the building capacity drills above). Once you’ve mastered that, move into sitting and practice keeping the back in neutral while moving your arms and legs. Then advance to standing. The basic functional goal would be able to maintain back position while moving around and the advanced goal would be to be able to do so under load (which includes running as well as with weights).
  • Anti-sidebending. For the legs, this is checking hip drop (see above). For the arms, this is carrying an uneven load, like a heavy weight in 1 arm down at your side (suitcase carry). This can be practiced with any variation of weight on 1 side: suitcase carry, rack carry (elbow bent), waiter walk (arm overhead), or uneven carry (like 10 lb in 1 hand and 20 lb in the other). The goal with all of these is to stay completely vertical with no bending towards the loaded side.
  • Anti-rotation is generally used for swinging sports. The goal in swinging movements is to generate power in the hips, transfer this power through the spine and to the arms. To maximize power transfer through the spine, the core muscles must check the spine from energy leaks by preventing excessive rotation (which would ‘absorb’ force). To practice this movement, the unit turn is used. A unit turn is when the body rotates through the hips while keeping the spine relatively rigid. This means the hips and shoulders will face the same direction the entire time. If they ‘break’ from each other, then it means the spine over- or under-rotated which would be incorrect form for the unit turn. This can be performed using a cable/band for resistance or a barbell with one end wedged in the corner of the room/landmine device. You then hold on and practice rotating against the resistance while keeping your hips and shoulders facing the same direction the entire time.
  • Anti-flexion is generally used for maintaining neutral posture under weight. Pretty much any standing loaded exercise has a component of this because the weight is almost always in front of your center of gravity which means it will be acting to pull you into a slumped posture. This most obviously applies to things like the deadlift and squat, but also to exercises like curls and shoulder raises. Therefore, anti-flexion can be trained with most exercises by setting your back in neutral position and actively keeping it there. Loaded carries such as the farmers walk and the Zercher carry (carrying something in the crooks of your elbows) are very helpful, especially because they require some sort of deadlift or clean to get the weight into carrying position.

Brace yourself

It was either this picture or the one 2 seconds later when he’s projectile vomiting.

What do you think when you hear the term ‘adult braces’? You probably come up with the stereotypical image of a muscular man/woman, absorbing a mighty blow from an enemy while engaged in epic combat – the words “Fearsome adult braces for legendary battle” engraved below the scene.

Bracing your core is the second category of core function. Read the previous 2 posts to learn more about the first function: pulsing. Bracing is when you contract your core muscles to protect the spine and abdominal contents. It’s done when lifting or carrying something heavy to stabilize the spine and minimize harmful shear. The stabilization benefit also improves force transfer when lifting and carrying objects. Because many of the muscles activated (rectus abdominis, the obliques, the lats, etc.) are more superficial than the internal organs, they also can act as muscular armor for the abdominal contents. Just imagine someone was about to punch you in the stomach – you brace your abdominals in anticipation to protect yourself. Learning to brace your core is important for safety, but in order to use this method in real life, you also have to be able to breathe at the same time. If you go to take a breath and lose your bracing, then you could be more vulnerable to injury.

Learning to brace

So to start, we’ll go over just learning to brace your core, then practicing bracing and breathing. There’s a couple different methods to learn how to brace your core. First, place one hand on the crest of your hip so that your fingers are on the lateral portion of your abdominal region. Press you fingers into your stomach. When you engage your core, you should feel it with your fingers here. Keep palpating to check that your core is engaged while you try these different drills.

  • Imagine you’re going to be hit in the stomach and you need to brace yourself.
  • Push your deeply fingers into your lateral abdominals and then use your muscles to push your fingers back out.
  • Pretend to begin to make a “k” sound but don’t actually make the sound.
  • Walk while holding 20-30 lb in one hand down at your side (like you’re carrying a suitcase). Your opposite hand can be on your abdominals, palpating your obliques.

Bracing and breathing

Now that you’ve learned how to brace your core, the next step is to practice coordinating it with breathing. Below are several useful exercises you can work into your training to improve this skill.

  • A classic is your coach or workout partner randomly poking you in the core with their hand or even a stick to ensure that you’re staying braced. This can essentially be done with any exercise. Your goal is to complete your set while remaining braced the entire time which will require breathing with your core braced.
  • The hardstyle plank is like the above drill only x100. You get down into a plank and then tightly brace your core. Your workout partner then walks around you and kicks your core – at random times, in random places. This is obviously a hardcore drill. Your partner should start the kicks relatively light, more to check form than anything. The better you get at this, the harder they can go. Each rep of this is holding the plank only for 10-20 seconds generally and you need to breathe while doing this. If you’re in any sort of contact sport, this drill is your friend.
  • This is a great functional bracing exercise you can do on your own with no partner. Just do any loaded carry (an exercise where you carry heavy weight from one place to another). Remember the goal is to both brace and breathe. The suitcase carry (carrying the weight in only 1 hand) is especially a good one.
  • This final one is meant to target the crucial skill of being able to brace your core, not just while breathing but while breathing heavily (like what would be required in most sports). You start by doing an intense interval of 30-60 seconds of some exercise (could be cycling on the bike, running, bodyweight squats, pushups, etc.) – enough to get you huffing and puffing. Then you’ll immediately drop down into a side plank which you hold for 10 seconds before switching to the other side. Your goal is to maintain the side plank with perfect form – no sagging or cheating form in any way. Then rest for an interval and then repeat. In order to do a perfect side plank, the core must be properly activated so this drill is very useful because you can physically tell if you’re doing it right.

Bracing application

Now finally, specific movement application. Once you’ve mastered the drills above, applying to any movement is very straightforward. You should be able to voluntarily brace your core, keep it contracted, breathe, and move – all at the same time. Practice this with whatever movements you need – lifting and carrying, squatting, sparring, pressing, anything. The finest control comes from learning to modulate how contracted your core is. In some movements, like lifting a 10 lb box, you’ll want to brace your core firmly but you won’t need to do it too hard. On the other hand, during a max deadlift you’ll want to brace your core as hard as you can throughout the lift. You will also have movements where core tension will fluctuate within the movement. Take a clean and press: optimally, you’ll brace your core throughout the entire movement, but pulse your core at the power clean position (bar just below knees) and to initiate the press. The same situation occurs while fighting or sparring. You’ll keep your core generally braced the entire time to protect your internal organs but you’ll pulse it when striking. To master these advanced application techniques, you have to do specific training with each movement.

Stay tuned for the final part of this core series which will cover the final function of the core – checking.

Pulse setting

It is said that the truest golfer will drive not just golf balls, but shadows, away.

Today’s post is building on the last one on pulsing. To recap, pulsing is a brief, but intense, core contraction to allow a strong force transfer through the spine for fast movements in sports, such as striking, throwing, or jumping. Read last post to learn about how to pulse your core. Today’s post covers learning to coordinate pulsing and then applying pulsing to your sport.

To train coordinating the pulse, you’ll need something to swing. You can use a long stick like a broomstick or put a ball/sand/whatever in one end of large bag and tie that section off (essentially forming a weight attached to a rope). With either of these objects, you’re going to do a continuous swinging pattern. With the stick, you’ll be swinging it behind your head – look up Indian club swinging for a video of this pattern. With the bag swing, you’ll just be swinging it over your head like a helicopter. With both of these patterns, the end of your object will be tracing a large circle so you can imagine that circle is a clock face. Pick a random number on the clock (like 2 o’clock) and every time you hit that point, pulse your core. Practice going around 5-10 times to begin, striving for consistency right at your designated time. This will help you coordinate your pulse with movement. To begin, just do a few sets with a different time to pulse each set. Once you’ve mastered that, you can then pick 2 different times to pulse in the cycle, like at 2 o’clock and 8 o’clock.

Once you’ve mastered coordinating pulsing, you can use it with any movement. Some power-based movements to train with could be sledgehammer swings, medicine ball throws into the wall or ground, or fast weight-based movements like the Olympic lifts, thrusters, etc.

Now for application to your sport. Once you’ve gotten good control, applying the pulse to your sport is relatively straightforward. Just practice the movement with a pulse timed to occur just before contact so that your core is engaged strongly as you make contact. You’ll know you’re doing it right because you’ll feel like you’re hitting the sweet spot or in the groove – you suddenly generate much greater force (ie. the ball goes farther) without feeling like you’re swinging harder. Now you just need to practice your different swings/strokes/movements to learn how to apply the correctly timed pulse to each and eventually make it automatic.

Grunt work – pulsing

So there I was – the lowest point in my life and about to get smacked by some lady with a tennis racket. You’re probably wondering how I got here. Well, its long story…

If you’ve ever watched a tennis match with women who were pro tennis players (and I mean pro as in professional, not as in they’re in favor of tennis players), you already know about core pulsing. The grunting, the screaming. But it’s not limited to tennis, any martial artist also includes the ‘power yell’. Why the yelling? Some might say it’s to intimidate or confuse (or arouse) your opponent. Really it’s just good biomechanics.

Today we talk about pulsing – one of the categories of core function. The core is used to stabilize the spine to allow optimal force transfer. Pulsing is when the movement is very intense but very brief. Imagine you’re going to a pool party and you and your friends always, at some point, get in a pool noodle war. The problem, you realize, with using a pool noodle is that you can swing as hard as you want, but the floppy foam doesn’t transfer your force properly. Having a stroke of genius, you decide to slide a PVC pipe inside your pool noodle – and it works like a dream! Suddenly, your hits are landing with proper force and the pool runs red with victory. All powerful sports movements are similar. You generate power in your hips (even if you are doing an arm controlled task like throwing or swinging) – the power must travel through your core and then be transferred to your target. If your core is floppy like the pool noodle, then even if you generate a massive amount of power from your hips, most of it won’t make it to your target.

The idea might occur, why not just keep the core solidly contracted the entire time? You can answer your own question by trying that. You’ll quickly find that by contracting your core too strongly and too long, you’ll be too rigid for fluid movement and not only lose the full motion needed in your sport but also lose the whip action that amplifies your movement. It’s also very draining to do that – physically, to maintain the contraction and mentally, to concentrate on holding the contraction. Finally, it tends to be more difficult to breathe which turns out to be somewhat important.

Learning to use your core to properly improve quick and powerful movements has 3 stages. First, just learning to contract your core voluntarily. Second, learning to generally coordinate this contraction to be fast and at the right moment. Third, learning to pulse in your specific sports’ movements.

Today we’ll talk about just learning to contract your core. There are 5 common ways to pulse your core. The scream, the grunt, the hiss, the snort, and silently. To appreciate feeling your core contract, rest a hand on the crest of your hip so that your fingers are on the lateral portion of your abdomen and press your fingers in to feel your abdominal core muscles. During these drills, you’ll feel the muscles contract underneath your fingers. The first 4 methods all involve making a noise because in order to exhale quickly, your abdominal muscles contract to force the air out. This powerful contraction is helpful due to the abdominals generating spine stabilizing pressure in the abdominal cavity as well as the benefit of the core contraction itself. It is possible to accomplish a similar effect silently (the 5th method) by using the Valsalva maneuver. This is when you close your windpipe and contract your diaphragm to generate abdominal pressure. Think of this as sealing a container (closing the windpipe) and then pressing a plunger down (contracting the abdomen) – this will dramatically increase the pressure in the rest of the container (the abdominal cavity) which stabilizes the spine (amongst other helpful things).

Going back to women’s tennis, it’s pretty obvious how to use the scream and the grunt – you just scream or grunt at the right moment (timing is crucial here). The snort is similar but instead of exhaling through the mouth, you just quickly exhale through your nose. So let’s discuss the other two methods which are more technical. For the hiss, push the top of your tongue into the back of your front teeth and close your mouth enough that when you try to breathe out, there’s resistance (because your tongue is blocking air from leaving). You’ll feel your core tightening when you do this – palpate your abdominals to confirm. Now do this quickly by making a quick hissing noise. Notice that you get a powerful pulse.

Finally, the silent pulse. While it probably sounds appealing to pulse silently to avoid making a noise in public, practically it’s not as useful when actually performing because it’s easier and much more natural to actually exhale (thus making a noise) in some form or another. However, we will go over how to do it now because it is much more useful when bracing your core (the second function of the core). To perform the Valsalva maneuver, pretend like you’re going to make a “k” sound but don’t actually make the sound. You’ll feel pressure in your throat (where you glottis is keeping your windpipe closed) as well as tightening in your diaphragm (which will be lowering down like a plunger) and contraction in your core muscles – palpate them to confirm contraction.

These drills cover the first aspect of pulsing your core – just learning how to pulse at all. The next post will cover the other 2 aspects: general coordination then sport-specific coordination.

Defining your core

It sat in the shadows watching… waiting… soon, very soon…

The core, much like Amazon, is the cause and solution to all of your problems. Want to lift a few more pounds at the gym? Work your core. Want to lose a few more pounds at the gym? Work your core. Want to last longer in bed (where you do sit-ups and other ab work)? Work your core.

If you want to strengthen your core, first you have to add definition. There’s a lot of debate on what the core is, or where it is, or even when it is. I use a functional definition – it’s the muscles that facilitate force transfer through the spine. Depending on the direction of the force, this could be completely different muscles from movement to movement.

To illustrates the core’s purpose, imagine using a hammer that was much flimsier in the middle. Trying to hit a nail down wouldn’t work well because all the power you applied to the handle would be lost. In this instance, the core needs to transfer a powerful force for a split second – much like the body would when throwing a punch or hitting a ball. In other instances, the core needs to transfer force for several seconds such as when lifting and carrying a heavy object. And finally, sometimes the core needs to transfer force many times over a prolonged period such as when running or swimming.

In most of these scenarios, power is being generated by the legs which must then be transferred through the core where it is then directed by the arms to some outside object. Take hitting a golf ball. A large amount of power is generated by the hips which must go through the spine to make it to the arms. If the core doesn’t stabilize the spine optimally, then some amount of that power will be lost and won’t make it to the arms. The better the core stabilizes the spine, the more power is transferred to the arms. From there, the arms do 2 things. First, they direct the force. In this example, they aim the club to hit the ball. Second, in a rotational movement (like swinging), they act like the end of a whip to increase speed and power. You can visualize this like the hand of an analog clock. For those of you youngsters who don’t know what an analog clock is, imagine I’m talking about a door on its hinges (as the center) instead. If you move the part of the hand closest to the center an inch, the end of the hand which points to the numbers will move much, much further. Likewise, when you rotate the hips, the arms will relatively travel further (greater distance) in the same amount of time, resulting in higher speed (because velocity = distance/time) and more power. In a non-rotational movement, like lifting a box up, the arms will just direct the force – meaning your legs generate power, your core transfers that to arms, the arms hold onto the box (no whip action generated).

Alright, so over the next week, I’ll be talking about each of the 3 different classes of core function and how to improve your performance in each. Below is a list of the 3 categories. Keep in mind that there’s really no difference between the 3 categories – they’re all stabilizing the spine to facilitate force transfer and just vary in terms of intensity and duration.

  • Pulsing: activating the core strongly for a very fast, but brief, contraction. Used for any activity that you’re hitting something, from fighting to tennis to soccer. Also used for jumping (think of it as kicking the ground in the face).
  • Bracing: activating the core enough to stabilize the position of the spine to keep it in a safe position, generally for seconds to minutes in duration. Due to the longer duration, being able to breathe while bracing is crucial. Used for lifting, carrying, or even fighting (as muscular armor to protect the internal organs).
  • Checking: okay, so I totally just made up that term to describe this function. When you run, with every step you take, your body must fight collapsing. If your body collapses slightly with each step, you ‘leak’ energy that could have been put towards propelling yourself forward. Think of this like running with really squishy shoes on – when they compress, they absorb that force. If you had firm shoes, then they wouldn’t absorb the force and it could be used to move your body forward. Part of your core’s function is to check (meaning to prevent) “energy leaks”. This is the most common usage of the core and mostly happens without our conscious awareness. It’s used in all movements of the body, but generally in sports, this component will be assessed with movement analysis to find ‘weak links’ in your form.

Winning the hypertrophy

“Arms like Lady Justice” program for a limited time only! Call now!!

Many in the gym seek the hypertrophy. This is not an object like some giant trophy, but a destination. And that destination is the collective objects of your muscles being bigger – essentially turning into giant trophies. So how do you win such prizes?

There are 2 main theories about what games must be played to win the hypertrophy. The first is that the muscle must be exposed to the stimulus of a heavy load, eccentric (lengthening) loading, and high metabolic exertion. In bro terms, this boils down to:

  • Start with heavy compounds (like squat, bench, deadlift, rows, etc.) in a full range of motion and with a controlled tempo (lowering the weights with control on each rep) – this provides the heavy load and eccentric loading.
  • Follow the compound movements up with isolation movements (curls, leg extensions, shoulder raises, calf raises, etc.) until that muscle group gets ‘the pump’ – this ensures high metabolic exertion.

Most people working out in the gym only do 1 of those 2 things. They’ll either lift heavy in the compounds and skip isolation movements (this is me). Or they won’t lift heavy and only do light-medium weight ‘bodybuilding’ routines. For hypertrophy (per this first theory), it’s best to have a little of both.

The second theory is that the only stimulus needed is working a muscle out to volitional failure. Volitional failure is when the muscle is too tired to complete another rep with perfect form. So if you’re doing curls and have to use momentum to get the weight up or you have to do the rep in a partial range, you’ve reach volitional failure. This would seem quicker than the first method because you could just do squats to volitional failure and call it a day for your legs. Except that in a compound movement, there’s always a relatively weak link. So your quads might give out before your hamstrings and glutes, meaning that the quads have reached volitional failure but the rest of your leg muscles didn’t. This results in you having to do several different movements for each muscle group which looks remarkably similar to the routine from the first theory. You might also think that you could just pick a light weight and do isolation exercises until hitting volitional failure for each muscle group, thereby dodging having to lift heavy. But if you want to truly hit volitional failure, you’ll have to actually go to failure. With a light weight this is much more time consuming than using a moderate weight. Also, I consider this a moot point because it’s easy and natural to combine both theories. Here it is!

Step 1: Do compound movements with heavier weight but low reps – like 3 sets of 5 reps with 75% 1RM or 4 sets of 4 reps with 80% 1RM.

  • Perform movements in a full range of motion (not the maximum range of motion possible, just a full range of motion) and with a controlled tempo.
  • Lower body compound movements: squat, lunge, deadlift, clean, kettlebell swing
  • Upper body compound movements: bench press, push-up, pull-up, row

Step 2: Follow up heavy compounds by performing several sets of isolation exercises with a moderate weight until you achieve ‘the pump’ in that muscle group. Do the last set to volitional failure. Select a weight that lets you both get a pump and go to volitional failure within 5 sets of 10-20 reps each.

  • Continue using a full range of motion and controlled tempo with isolation exercises.
  • Muscle groups to address: calves, quads, hamstrings, glute max (butt), glute med/min (outside of hips), lats, upper back, anterior/lateral/posterior delts (shoulders), chest, biceps, triceps, forearms

Step 3: Claim your prize.

Want to lift more? Shave your legs!

Smooth legs = huge legs

How does shaving your legs make you lift more? There is an improvement in your legs’ aerodynamics which reduces resistance and allows you to accelerate faster. The science checks out, so the only question is how to shave your legs? That and more deadlift tips below!

  •  Before you go down to grab the bar, look straight forward and find something at eye level. Then once you’re in the start position, look back up at the point and keep it in your sight the entire lift. You don’t have to crane your head up to look at it – just use your eyes (to keep the neck in a more neutral position). By spotting something, you’ll more naturally stay upright instead of getting bent over which will result in the bar being too far forward mid-lift. If you deadlift in front of a mirror and use your own eyes as the marker, you’re basically just one of those dogs who barks at his own reflection.
  • A wise man once warned me, “going to the bar will bring you down.” It was only many years later that I realized that he was trying to teach me how to deadlift. Use the bar to pull yourself down into proper position. By pulling yourself down against the bar, you not only generate a lot of tension but you also pull the bar up slightly which lets you start the lift smoothly (called taking the slack out of the bar) instead of jerking it up. I still don’t understand why he said it so ominously…
  • Once you’re ready to start, drive the floor away. Instead of thinking about the deadlift as a pull (which it’s commonly called), think of it as a push like a leg press. Pulling often makes people straighten their knees too quickly and end up in a bent over position and losing the bar forward. Pressing the bar usually helps people automatically get their hips in the right position and stay more upright. Another way of driving the floor away is to get drunk and yell really mean things at it, but I wouldn’t because the floor doesn’t deserve that.
  • Keep the bar on your shins at all times until past your knees. You should basically scrape the bar up your knees. This gives you the best leverage but more importantly, it shaves all those pesky air-resistant hairs off your legs.

The conventional, and sensual, deadlift

Wednesday = hump day. Locking out deadlift = “hump the bar”. Wednesday = deadlift day.

Is there a greater feeling than the strain of trying to lift up something truly heavy? Yes, probably most feelings. But it’s still very satisfying and, dare I say, sensual. Today, we discuss the conventional deadlift which means your legs are inside your arms when you lift (in contrast to the sumo deadlift where the legs are wider than your arms). I’ll begin by listing some absolute rules. Violating these rules directly decreases the sensuality of your lift.

  • Your low back must be set in a ‘neutral’ (meaning slightly arched) position and kept here for the duration of the lift. This is to avoid shear on the lumbar spine. Shear is a bad force on joints. Think of your joints as fluffy sheep who are very proud of their wool – they don’t want to be sheared at any cost. Injury is more related to the actual rounding motion of the low back under load. Meaning if you start with a very arched spine, it’s likely you will lose some of that arch during the lift which is dangerous. It’s actually safer to start with less arch and keep that amount than start with more arch and lose some. Remember, when you go to pull, keep your wool.
  • The arms must be ‘long’ the entire lift. This means elbows straight – trying to lift the bar with elbows bent is a good way of tearing a bicep. This can happen when people “grip and rip” to try to jerk the bar off the ground. To be fair, most of these people were never told what to ‘rip’ specifically and so they may just be committing 100% to the lift. The other part of ‘long’ arms is a performance thing. The ‘longer’ your arms are, the less distance the bar will have to travel. There are 3 ways of functionally lengthening your arms. The first is keeping the elbows locked straight. The second is taking a shoulder width grip. Go ahead and stand up and let your arms dangle down. Notice how far down your body they are. Now spread them wide a few inches and notice that your hands rise up. Magic? Possibly. So, in general, you want them to hang straight down. Some people do need to take a wider grip because they are bigger and their stomach may get in the way of their legs so they take a wider stance and wider grip. Finally, shrug your shoulder blades down towards the ground and notice how your hands get lower. This actually comes in two delicious flavors. A) Strawberry blast: You can shrug your arms down with your shoulders rounding slightly forward (while keeping low back static) – this will allow you to start the lift with your hips slightly higher, but make locking the weight out potentially more difficult (depending on how strong your upper back is). B) Watermelon banana: You can shrug your arms down with your shoulders pulled slightly back – this will mean your hips aren’t as high at the start of the lift but lockout will be easier because you don’t have to pull your shoulders back at the end of the lift. In general, I would recommend people go with watermelon banana (shoulders slightly back). You don’t get to start with your hips as high, but in return you get an easier lockout and you can take a slightly wider stance because with your shoulders back, your arms are a little wider while still vertical. A wider stance also decreases the distance the bar has to move (hence why most lifters can deadlift more in sumo position than conventional). However, the easiest way to find out is to try both positions and see what actually works for you.
  • You shins should not be tilted outward or inward – meaning your feet and thighs should point the same direction. This minimizes shear on the knee sheep.
  • The bar must touch your shins (until past the knees, obviously). This means starting with the bar on your shins and sliding the bar up your shins as you lift. The fronts of your shins are basically pole dancers trying to pay their way through med school. If they want to reach their goal, they gotta work the pole. So keep the bar close – for their sake. Letting the bar get away from you will also dramatically increase the leverage acting on your low back and hips, making the lift much harder and much less safe. This is the most common mistake people make. But the correcting cue most often given, “pull the bar into your legs”, is also not really correct. This goes into the next absolute.
  • Your arms must hang vertical at all times. This absolute, which I’ve saved for last, is the king. It’s almost always mentioned in deadlift articles, but it’s importance is not emphasized enough. If you made a model of a human deadlifting (and why wouldn’t you?), they would form a closed loop from the hands on the bar, up to the shoulders, through the trunk to the hips, down the thighs to the knees, and down the shins where the loop would be closed where the shins meet the bar. Of all of those segments, the orientation of only one stays constant – the arms hanging vertical. This is because the arms are holding onto a very heavy weight which is constantly pulling the arms vertical. It would take a ridiculous amount of shoulder strength to pull the arms out of this vertical position – with a heavy deadlift, that’s not happening. So the arms will hang vertical. Try this: get into the deadlift position and let your arms dangle straight down. Now straighten your knees a few inches while keeping hips at same angle and notice where your arms now hang: your hands will be several inches away from your body. Now how are you legs supposed to pay for grad school? Straightening the knees too quickly without straightening the hips at a compatible pace is why people lose the bar forward. It’s also why telling them to pull the bar to their body (a shoulder extension cue) is addressing a ‘symptom’ rather than the root cause.

I’ll discuss the cue that should be used to keep the bar close next post. For now, I’ll go over setting up the deadlift based on the absolutes. Because the body forms a closed loop with the hands on the bar and the bar on the shins, if the arms are kept vertical and the bar touches the shins, then there is only 1 given body position at each bar height. The bottom position is then determined by 1 variable: bar placement over the foot. The further forward the bar, the more dorsiflexion at the ankle required to touch the shins to the bar. From here, there is only 1 angle that the knees and hips can be at to allow the arms to be vertical. The further back the bar is, the closer to the shins, and the more vertical the shins can be. Again, with the arms vertical and the shins touching the bar, there is only 1 position body position. The further back the bar, the higher the hips (more knee extension) and the more vertical the shins. Generally, the bar should be placed over the middle of the length of the foot, for balance. Too far forward and the hips will need to be very low for the arms to be vertical (which is fine if you’re doing an Olympic-style deadlift). Too far back and the hips will be too high, resulting in losing the bar forward.

With all lifting form, I always recommend you start with general guidelines but use this position only as a starting point. From there, it’s best to do multiple sets at the same weight and experiment with variations to find your strongest position. People vary in their limb and torso length ratios and other factors. If you’re truly interested in maximizing your lifts, take the time and effort to learn what works for your body. That said, here’s the process. I’d recommend using a weight that is moderately heavy like 80% your max and do 2-3 reps at a time with this same weight.

  • Pretend like you’re going to jump as far forward as you can. This is your starting stance width. Make sure your knees and feet point the same direction.
  • Start with bar over the middle of the anterior-posterior length of your foot. If your foot points straight forward, this is just the middle of the foot. The more your foot points outward, the ‘shorter’ the anterior-posterior dimension of the foot, bringing the middle of the length of your foot closer towards your shins.
  • Get in the bottom position where your shins touch the bar, your low back is set, and your arms are vertical.
  • Deadlift the weight.
  • If your knees were not touching your arms in that position, then widen your stance 1/2 – 1 inch on each side and then get into position, with all the requirements (bar on shins, back set, arms vertical). With the bar in the same position over the foot but the stance wider, you will need to ‘squat’ a little lower to get into the correct position.
  • Deadlift the weight. Compare to how the first position felt.
  • Continue slowly widening your stance, deadlifting, then comparing until you can’t go wider because knees are touching your arms.
  • Now for the opposite. From the widest stance, bring both feet in 1 inch and then turn your feet out a little bit extra. Go down into the bottom position with all requirements met. With your feet pointing more outward, in order to keep thighs and feet aligned, you will have to open your hips up and push your knees out. You should turn the foot out and push your knees out enough that your legs are touching or near touching your arms. This will result in your hips being closer to the bar, but more knee flexion required to get the arms vertical – thus decreasing the load on the hip, but increasing the load on the knee. This style of deadlift is a little more technical as well because your foot will point more outward, thus ‘shortening’ the anterior-posterior length of it which makes balance more difficult (similar to sumo deadlift).
  • Deadlift the weight.
  • Continue narrowing your stance incrementally, turning your feet out and pushing your knees out more, deadlifting, then comparing until you’re not flexible enough to open your hips anymore, your heels are touching, or there’s a clear drop off in strength.
  • As you go through this process, make sure you note which positions to come back to, to compare them.
  • Some people may be strongest with as wide as stance as their arms permit, some people may be strongest with a narrow, frog-like stance, but most people will be strongest close to the horizontal jump stance.
  • You’ll only know what’s best for you if you experiment!

Welcome to the gun show: featuring pistols

Wall squat: advanced version

People often ask me, “who are you, are you packing heat, and if so, where?” That’s why I preemptively introduce myself to new people by saying, “I’m Eric and I’m packing heat in my pants.” Honestly, it’s saved me a lot of time. It’s important that the exact location of where I’m packing heat, which is in my pants, is emphasized. This is because the source of the heat (quick reminder: it’s in my pants) is each of my legs. You see, I’ve been known to fire off a round of pistol (single leg) squats at a moment’s notice.

If you wished you could pack heat, especially in your pants, but could never master the pistol squat, read on! There are 3 elements needed. In order, they are mobility, strength, and stability.

Squat mobility

There is a certain amount of mobility required to get into the bottom position. If you can do a full range of motion double leg squat, congratulations – you’re there. If you can’t, then you probably lack ankle flexibility (into dorsiflexion). Grab onto something sturdy in front of you, then squat down as far as you can go while holding on. Pull yourself forward while keeping your heels flat on the ground and stretch your ankles. When you can do a full range squat with no assistance and keeping your heels down, you’ve got the mobility you need.

Single leg strength

Surprisingly, some people who work out already have the required strength to do a pistol squat. If you can step up onto a step or box that’s about mid-thigh high and lower back down with control, then you’re there! If you can’t, then first start at a height that you can step up and lower down with good control. Start at this level by stepping forward onto the step and then slowly controlling back down. When you’ve gotten strong at this, then step up sideways onto the box. From here lower your opposite leg down with control, and tap the ground with your foot then come back up. Your goal is to have enough control that you can tap your foot on the ground but not put any weight on it. Once you’re able to do that 5-10 times with control, move onto the next height and continue this progression until you’re able to do reps at the mid-thigh high step.

Single leg stability

Ah, the most elusive part of the pistol squat. If you’re someone who already was able to achieve a deep squat and could do the mid-thigh high step-up/down, then you might be wondering why you can’t just do a pistol squat. Hip stability is the final link – and the most common weak point. The first level is to be able to balance on 1 foot for 10 seconds. From here you can progress to the single leg Romanian deadlift. This is where you stand on 1 leg, and then bend forward at the hips until you trunk is parallel to the ground. Then return back up. The goal is to be able to do 5 slowly, with control, without touching down with your other foot. The final level that will graduate you onto pistol squats is the hip airplane. Start by doing a single leg Romanian deadlift but stop halfway down. From this position, rotate to drop your opposite hip down towards the ground, then rotate to lift your opposite hip towards the ceiling. That is 1 rep. Your goal is to do 5 in a row in this position. If you just tried this exercise and found it incredibly difficult, yes – you’re doing it right. If you’re revisiting this post after having worked on the hip airplane for several weeks and you are wondering when it becomes easy – it doesn’t. But if you can do 5 reps of the hip airplane, you will have all the stability you need – not just for pistol squats, for anything. Don’t have the credit score to get the loan you need? Bust out a few reps of the hip airplane and get ready to sign your name.

Ready… Aim…

You’ve stretched to get the required mobility to get into the bottom position, you’ve churned out step-ups/downs until you can do them at mid-thigh height, and you’ve blasted your hips until you can do 5 reps of the hip airplane. Now, all that’s left is to fire a squat off. As congratulations, here’s a pro tip: don’t tell people you do 2 sets of 5 reps of pistol squats. You do 2 clips of 5 rounds. And there is no resting between clips – only reloading. Now – fire!

Squat form determinants

At some point, all weight lifters must bend the knee to serve the king of exercises – the squat. The question then is, how to best serve?

First, this guide isn’t for Olympic lifters. If you’re an Olympic lifter, your only goal is to squat as similarly to the recovery phase of the clean or snatch as possible. This means your form doesn’t have much leeway – your stance should be the same as your catch stance, you should squat as deep as you physically can, and your trunk must stay completely vertical.

If you’re not an Olympic lifter, then this guide can help you. This isn’t a guide on what good form is, but rather a guide on how to find a form that works for you. It requires experimentation aka working out. To do so, you should adopt a program that switches the main squat exercise every 3-4 weeks so you can try out many different things. A very simple way to do this would be to pyramid up over the 3-4 weeks. Start with higher reps like sets of 8-10, then next week add weight and go to 6-8 reps, then 4-6 reps, then 1-3 reps. After you work up to this last week of heavy weight, change your squat form slightly and start back over.

Making adjustments

If you’re just learning to squat, you’ll need feedback to know when you should adjust things. This can be a friend who watches you from the side so they can tell you how you look. Or you can film yourself from the side. One of the best systems that will give you feedback in real time is using a phone and a tablet at the same time. Set your phone up to view you from the side and put the tablet in front of you so you can see it while you squat. Then you’ll use your phone to make a video call to the tablet. This way, you’ll be looking at the tablet which will be showing the footage of yourself squatting from the side. This will let you know if you’re squatting deep enough, how your bar path looks, and other form details.

Stance depth

This will be defined as when the hip crease is below the top of the knee. This is a standard definition.

Grip width

Grab the bar in the widest position possible. Notice the amount of upper back tension you have. Now slide both your hands in as far as you can and reassess your back tension. A lot more with them in, right? You want as much tension as you can. Most people will be limited by shoulder mobility. Get under a bar and pull into the bar like you’re trying to bend it and wrap it around your body. Gradually work your hands in. Experiment between as wide as you can grip it and as narrow as your shoulder mobility allows. Somewhere in there you’ll find a range that maximizes both your upper back tension and your pulling tension. Leave your hands here and step back from the bar. Take a note of where your hands are relative to the knurling.

Stance width

There are 2 things to account for with choosing how wide your stance is. Both of them occur in the bottom position of the squat. You want to pick a stance that is as wide as comfortably possible and that allows you to reach proper depth without your low back rounding. Proper depth and keeping the back in neutral are both important. You might be able to take a wider stance and reach depth but not keep your back in neutral. This isn’t good and you should narrow your stance slightly. Most people will end up with a stance that is 1.25x-1.5x shoulder width. The stance should also be relatively comfortable – if it feels like your hips are under too much strain in the bottom position, narrow your stance because there’s likely too much shear force on your hips.

Bar path

The bar path is determined by how you squat. There are 2 extremes: as deep as possible with trunk more vertical and as shallow as possible (while still reaching depth) with the trunk more horizontal. The more shallow squat will look like a box squat with the knees not moving forward much at all. While the shallow squat requires moving the weight the least distance, many lifters just aren’t built for this style in it’s most extreme form. Therefore, you should start with this style and then gradually experiment by letting the knees come forward a bit. Do a few cycles where you change this a little bit more each time. You’ll either find that with slightly more knee bend you can squat more or there’s a drop off in strength.

An important cue with bar path is keeping the bar directly over the middle of your foot. Often lifters will lean over too much which results in the bar being too far forward which is very disadvantageous. A good visual cue is to tie a rope to the collar of the barbell and let it hang down to the floor. It should touch the ground right at the middle of the foot.

Leg position

Many people try to push their knees out when they squat, often to prevent them from collapsing inward. This cue is fine, though often the real problem is they either are folding too far over or the weight is too heavy. First, make sure that you’re keeping the bar directly over the middle of your foot while squatting. This often means being slightly more upright that you might realize. If that doesn’t work, then there’s an easy fix: decrease the weight.

The other question is should the toes point forward or out? Pointing the toes forward improves the rebound out of the bottom of the squat because of a greater hamstring stretch, but adds more torque to the knee. So this is a matter of personal comfort with how much torque you’re willing to place on the knee. If you don’t want to do that, then most will agree that pointing the toes about 10 degrees outward puts the knee in a comfortable position.

Summary

  1. Find the grip width that maximizes tension within your available shoulder mobility.
  2. Find the widest stance width that you can comfortably achieve proper depth with a neutral low back.
  3. Experiment with different squat styles, ranging from box squat style (knees don’t move forward, trunk more folded over) to a hybrid squat style (knees do move forward some distance, trunk more upright). Find the style that you’re strongest with.

Performance enhancement – squat pattern

The ol’ superglue on the barbell trick – classic!

Have you ever been working out and just felt completely in the groove? The weights felt easy, and your body was firing perfectly. For most people, that’s a rare and elusive feeling. In reality, it’s a skill that needs to be built and practiced. Once mastered, you can call on it as needed.

First, the resource state needs to be elicited. Let’s talk squat. What’s needed is a scenario where you feel extremely powerful in that pattern. I have people close their eyes and imagine an emotionally arousing scenario where they have to jump extremely powerfully. If they play basketball, it could be going for a dunk. Hikers could imagine having to jump as high as they can to grab a ledge to pull themselves out of a hole. Any scenario where your blood is pumping and you use an explosive squat pattern. Then I ask them, “where do you feel that power in your body? What does it feel like?” One told me their hips felt like they were completely activated. Another told me their knees and upper back felt full of energy. Whatever you feel is right for you. Really focus in on those sensations. Then switch to imagining your squat (with whatever weight you find challenging) and FEEL that same power in your body. Now, the most important step. Practice applying this in real life. Before you squat, engage your body – visualize that scenario, draw your awareness to where and how you feel that power. Then, as you actually squat, use that power. Feel it in your body. Visualization is great but ultimately you have to feel it while you are doing it. Consider every time you squat as an opportunity to tap into your nervous system’s resources and practice engaging your body’s power.

This process is the same for other movement patterns, just with a different visualization. Stay tuned for my posts on other common lifting patterns. Comment on your experience below or any questions you have!

The United Strengths